Showing posts with label Misti. Show all posts

Friday, May 26, 2017

...room in my heart ~ Unity/Misti Blog Hop


Hello creative friends!!  Unity Stamps is doing a joint blog hop with My Sweet Petunia, and I am so honored to have the privilege  of joining these talented paper artists!  I have two cards, to share with you today, that I made using some charming Unity Stamps along with the "must have" Misti!!!  Seriously!!  I could not have made my second card without it!!

First of all, I'd like to share a sweet little watercolor card I made using Unity's "...room in my heart" stamp set.  Isn't this young woman and her baby just precious?!?!   

I started by laying a 4'x5" piece of watercolor paper in my Misti, lined up the image where I wanted and stamped it using Onxy Black Versafine Ink.  I left the stamp adhered to the Misti and left the stamped paper in place while watercoloring the image using Gansai Tambi Watercolors.  I then reinked the image and stamped over the colored image to make the lines bolder.  I can honestly say, that without the Misti, I would never be able to line up the image perfectly a second time.


I added a sweet little sentiment, that comes with this set, to the inside.


Now, for my second card.  I really had some fun with this one.  And once again, the Misti was a lifesaver!!    Let me tell you, Unity Red Rubber Stamps and the Misti are a dream team!!

I started by stamping this darling snail/mushroom image, from Unity's Happy Snail Mail set, 6 times onto X-Press It cardstock.  I colored the portions of the image that were going to be visible and started cutting out the layers so I could pop up each one for dimension.


Even a few of the stitched clouds (die by Lawn Fawn) are cut out and burnished to give them some extra depth too.


Below you can really see the dimension.


Now, the sentiment flag was a little tricky.  I wanted to use a new stitched label die I had just purchased from Pretty Pink Posh, but it was solid.  Unity Stamps are Red Rubber, so therefore not see-through, making it a challenge to line up perfectly.  Not with the Misti though.  They work together like they were just meant to be.  Let me explain how:

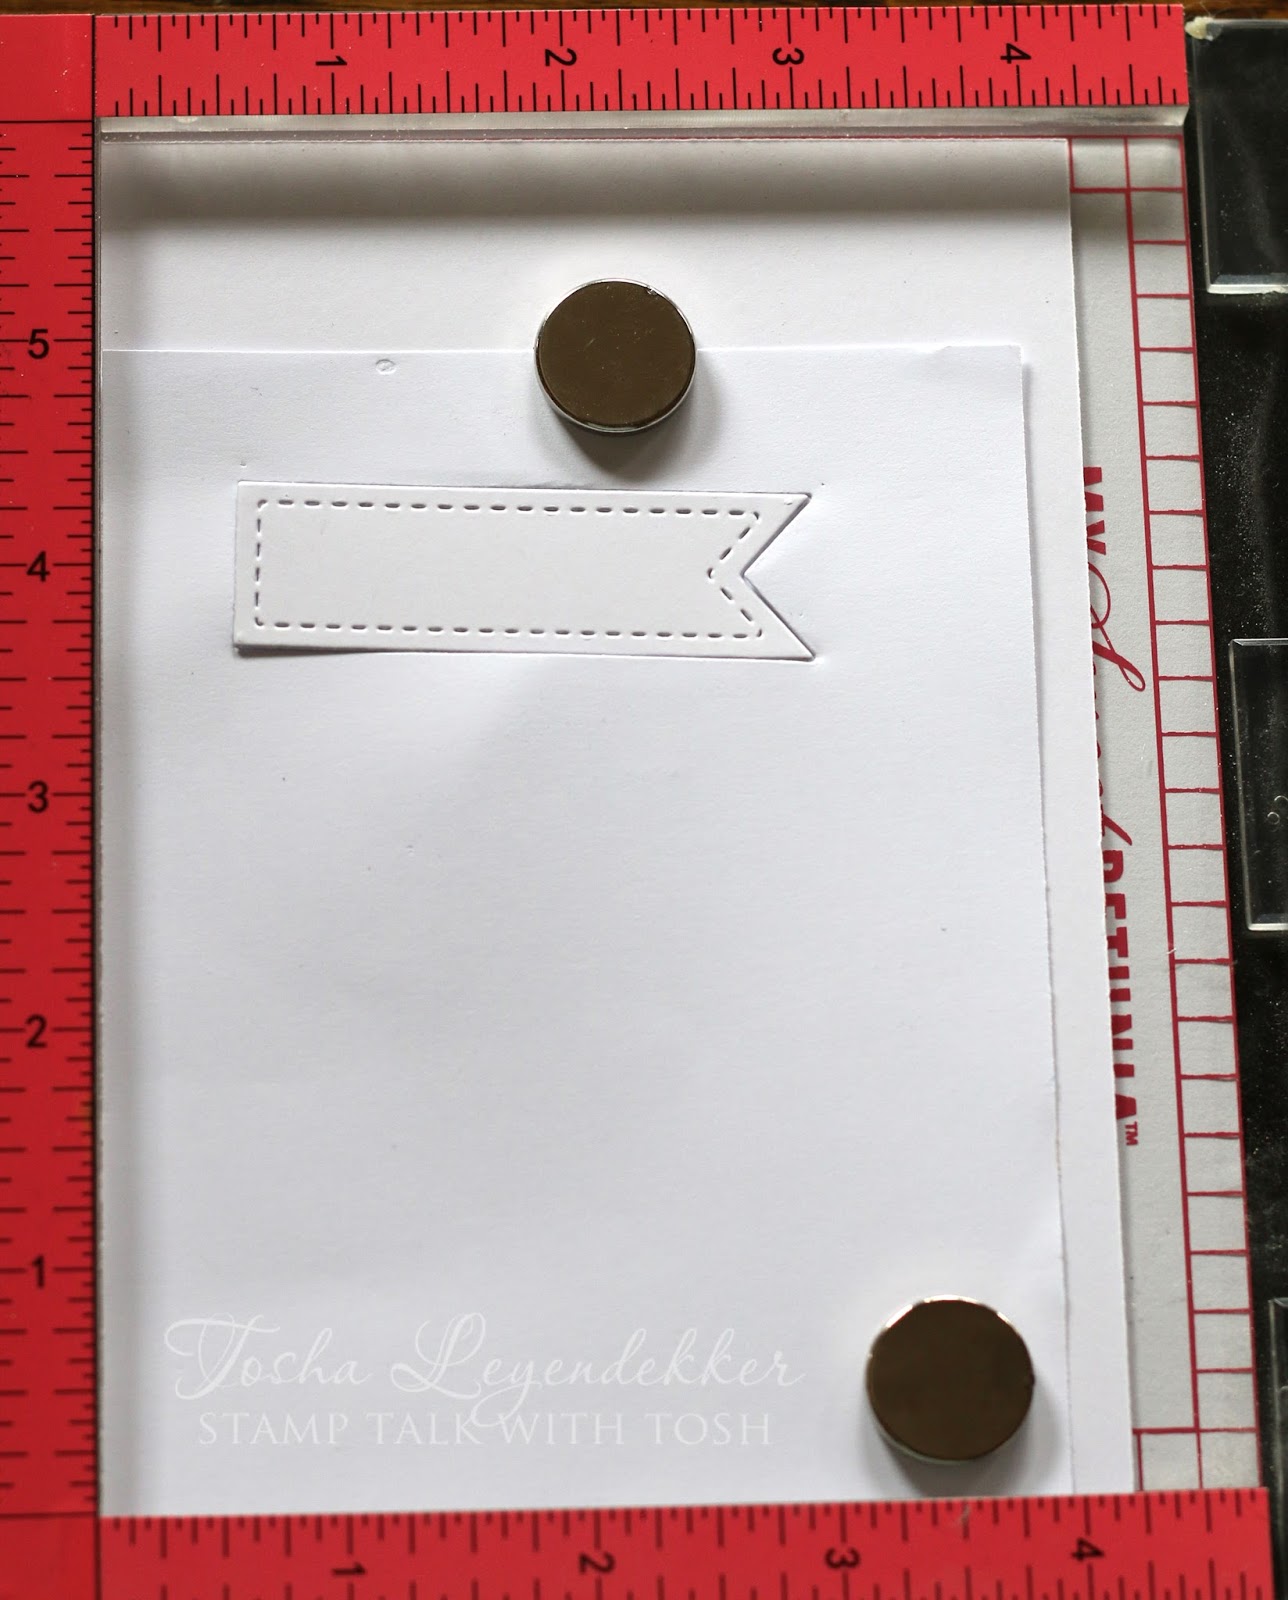
I started by diecutting the flag banner out of a piece of copy paper.  I laid it in my Misti just like you see below.


I then took the "...happy snail mail" sentiment "Just a Note" and laid it exactly where I wanted it to be, in the flag, and closed the lid, therefore adhering it to the other side. (oh....don't forget to take the foam mat out of the Misti when working with your Unity stamps.  They already are mounted onto foam, so the Misti won't close properly if you leave it inside.


I then diecut the flag out of a piece of cardstock and laid it in the negative space of the copy paper.


Lastly, I inked up the sentiment, closed the Misti and voila...a perfectly lined up sentiment!!  It couldn't work any more smoothly!!!


Would you like to win one of 3 Unity Prize packs and winner's choice of an Original or Mini Misti? All you have to do is leave a comment on each blog and you will be entered into the drawing.  You have until noon (central time) on May 30 to comment, and the winners will be posted on both the Unity Blog and the My Sweet Petunia blog on May 31st.

That's it for my projects today.  But don't stop here.  There is a ton of more inspiration to be seen.    Next on the hop is Kris Lancaster.  I've also included a complete list of all the hoppers today:


CopicsMushroom ~ BG07, BG05, BG02, BG01, YG11, YG09, YG06 Snail ~ R08, R05, R22, R21, R11, R00, YR68, YR65, YR61, Y38, Y17, Y15, Y13, Y11 Heart ~ R08, R05, R22

Thanks a bunch for dropping by!!  Enjoy the hop!
  Happy Stamping!


_______________________________________________________________

Mother and Baby
Stamps:  ...room in my heart (Unity)
Paper: Watercolor
Ink:  Onyx Black (Versafine)
Accessories:  Gansai Tambi Watercolors, Misti

Just a Note
Stamps ...happy snail mail (Unity)
Paper:  X-Press It, Black (PTI)
Ink:  Tuxedo Black (Memento)
Dies:  Stitched Labels (Pretty Pink Posh), Stitched Cloud Backdrop (Lawn Fawn), Stitched Rounded Rectangles (Die-Namics MFT)
AccessoriesMisti, Copics, Scor-Pal, White Pearl Pen (Kirarina Wink), Dimensional Tape 

Friday, April 7, 2017

Power Poppy ~ Sweet Petunia Hop


Happy Friday y'all!!  Today is an exciting day for sure!!  The Power Poppy Bloom Brigade is teaming up with the Sweet Petunia Team to do a blog hop featuring the Misti and the new Misti Creative Corners!!  I tell ya, the Misti is a definite "go-to" tool for me.  I use it OFTEN!!  Seriously!  And I'm super excited to show you how I used it and its new Creative Corners.  They are easy, fun and super handy!!


http://blog.mysweetpetunia.com/2017/02/creative-corners.htmlI have two projects to share with you today, and I'm going to start with my Lavender card, using Power Poppy's Lavender clear stamp set, and Misti's Creative Corners.   

I knew I wanted to make a "sentiment square", so I took the two right angle magnetized corners and put them together to form a square.  Now the magnets do not want to be close together when they are the same side, so I flipped one angle upside down, and they pieced together beautifully so I could stamp the sentiment around the square.  I put the L-ruler along the bottom to keep the magnet square in place, and removed it when I wanted to stamp along the bottom.


I also used the Misti to place the lavender bag image directly in the middle of my sentiment square.  I stamped the bag a second time on a scrap piece of paper to color, burnish, and pop up with a dimensional square right in the middle to give the bag some depth.  The edges are all glued down flush with the base.


Next, I have a masculine card to share with you, using the Power Poppy clear stamp set Move the Soul.   I have to tell you, I had an awesome time creating the background for this one.  With the Misti, and its Creative Corners right angle triangle, it is so easy to create a sentiment pattern on an angle.  I love how lined up the background is. 


The Misti has measurements along the side and bottom, so it's easy to position the triangle and stamp every time.  I just slid the triangle down in 3/4" increments each time to stamp the checkered strip.  Easy-Peasy!


The next step was equally as easy to add the "congrats" sentiment with the same triangle. 


Lastly, I gold embossed the stars from the same Move the Soul set.  I used Versamark ink and Gold Embossing Powder (Ranger) and unlike the rest of the background, I free-handed the stars because I thought it would take too long to stamp the stars and emboss them using the Misti...too many steps for me.


http://powerpoppy.blogspot.com/Now since it is the first Friday of the month, Power Poppy is issuing another Power and Spark challenge, which this time is provided by our dear, dear Julie!!  She has graciously provided 3 different sketches to try.  I used the middle sketch, with the banner, for my masculine card today.  I hope you will take the time to try out one of these 3 sketches.  I think they're super fun!! Besides, each time you participate, you have an opportunity to win some free Power Poppy stamp sets!  Now, that is inspiration if you ask me!!


That's it for my projects today.  I've provided a link list to all those participating in the blog hop today so you won't miss a one.  Each one of these gals is super creative and clever, so you'll want to make sure you stop by each of their blogs for some more inspiration and if you leave a comment on each blog, you will be entered to win one of two $25 Power Poppy Gift Code, or a Misti/Mini Misti.  Winners will be announced April 14 on this page of the Sweet Petunia blog for the Misti, and the Power Poppy blog for the gift code.  How cool is that!?!?!


Thanks a bunch for dropping by!!  I hope you've been inspired today!!  Have a super awesome weekend!!  And...

  Happy Stamping!

_________________________________________________________________________

Lavender
StampsLavender (Power Poppy)
Paper:  X-Press It, White and Kraft (PTI)
Ink:  Tuxedo Black (Memento), Smokey Gray (Versafine)
Dies:  Classic Square (Spellbinders), Anja's Square Dies (Marianne Creatables)
CopicsBag ~ E47, E44, E43, E42, E42, Tags and Lavender ~ V17, V15, V12 Leaves and String ~ G28, G46, G24, YG23 Background ~ W5, W3, W1, W00 
AccessoriesMisti and Misti Creative Corners, Dimensional Tape, Enamel Dots (Teresa Collins)

Congrats
StampsMove the Soul (Power Poppy)
Paper:  White and Black (PTI), Gold (Denami)
Ink:  Black Soot (Ranger), Versamark
Dies:  Stitched Fishtails (Elizabeth Craft Designs), Stitched Rectangles (Waltzingmouse)
AccessoriesMisti, Misti Creative Corners, Eyelets (SU!), Gold Embossing Powder 
  
Related Posts Plugin for WordPress, Blogger...
 
Site Design By Designer Blogs