Wednesday, July 30, 2008

Harvest Memories...

Fall is my absolute favorite season, and I'm a huge Northwoods Stamps fan!! So I thought I'd use this Harvest Mailbox image today. (We're roasting here in CA)

I love the deep etched rubber and the cozy scenes that Northwoods stamps are known for. They're a treat to color!!! I colored this image with copics, and paper toled some of the elements.

Here's a close up so you can see the dimension.

The side piece was cut with the largest nestabilities circle diecut, and stamped with "Miss You" from the Inque Boutique Sentiment Set.

I punched all the circles for the eyelets with my crop-a-dile, and popped up each panel with Scotch mounting tape. Finally, I finished it off with some chocolate twill ribbon.

CHECK THIS OUT!!

Michelle at Stamper's Dream has all her fabulous PRISMATICS in stock!! I would highly suggest checking them out!! The colors are phenomenal, the texture is fantastic, and the variety is awesome!!

Thanks so much for stopping by!! I hope the rest of your week is just awesome!!


Supplies:
Stamps - Harvest Mailbox (Northwoods), Miss You (Inque Boutique Sentiments)
Paper - Holiday Plaid and Reading Flowers (Chatterbox), Herbal Garden Medium and Dark (Prismatic)
Ink - Tuxedo Black (Memento)
Accessories - Copics, Nestabilities (Spellbinders), Twill Ribbon, Eyelets (Making Memories), Crop-a-dile, Scotch mounting tape, slot punch (Stampin' Up)

Sunday, July 27, 2008

Inspired Giraffe

The last Monday of every month, one of the CCEEers sends supplies to the others. It's so much fun to see what the others come up with with these supplies.

Deb Mills sent us all a bunch of fabulous ribbon in May, but due to some schedule conflicts, we weren't able to do her challenge until this month. Per her instructions, we were to design a card around the patterned ribbon of our choice. I chose this wide blue/pink/yellow/white plaid.

If you'd like to see what the other girls have created, head on over to our blog: CCEE Stampers

A young lady who used to baby sit my kids back in the day, just had her second baby. So I thought this was the perfect chance to use this ribbon. Most of this card was made with Nestabilities and the cuttlebug. I love the soft, cute look the Swiss Dots give the background. The blue dots are Baby Blue Liquid pearls, and the giraffe is colored with copics.

Supplies:
Stamps - Giraffe (Imaginisce Snag 'em Stamps Baby Powder Collection), Simply Said (MFT)
Paper - Papertrey
Ink - Tuxedo black (Memento)
Accessories - Copics, Cuttlebug, Nestabilities (Spellbinders), Liquid Pearls, Brads (Making Memories), Corner Ticket Punch, Word window Punch (Stampin' Up), Twill Ribbon
(Papertrey), Rotary scallops

Friday, July 25, 2008

Elegant Cardinal

You still have a couple of days to play along with the Dirty Dozen on SCS. (DTGD08) There were three challenges issued today: Silhouettes by Joan Ervin, Cupcakes by Taylor Van Bruggen, and Sewing by Julia S. I combined two challenges with this card...the silhouette and sewing.

I'm so into sewing lately. I love the finished look of it.

Michelle just got the gorgeous Inkadinkado Winter Birds set in her store, and let me tell you...they are GORGEOUS!! I had to have them right away. This is just one of the birds. Laurie will be posting another one tomorrow. There are 5 total.

I inked this guy up with Versafine Black Onyx, and embossed him with Judikins detail black ep. Man that stuff does detail brilliantly!! I then added a few Hero Arts gemstones and some glitter with my Quickie Glue pen. As a finishing touch, I sponged all the panel edges with Craft White (SU), added this gorgeous ribbon and a couple flowers. Dew drops are in the corners, and Adornit gems are on the oval.

Thanks so much for stopping by. I hope you're having a fabulous weekend!!

Supplies:
Stamps - Winter Birds (Inkadinkado)
Paper - Tres Jolie and 29th Street (My Mind's Eye), Vagabond (Kaisercraft), black
Ink - Black Onyx (Versafine)
Accessories - Rhinestones (Hero Arts, Adornit), dew drops, ribbon - boutique trims (Doodlebug designs), flowers (Paper Studio)

Wednesday, July 23, 2008

Giddy Up!!

Just playing today!! I got some Sugarnellie images awhile back and have been anxious to use them I thought todays Sketch on SCS fit perfectly with this Giddy Up! image!! How darling is she?!?! And oh what fun to color with my copics!!

I first picked out the dp I wanted to use, and matched the colors accordingly. I thought red might be a nice touch, so I added a bit of that too.

I sewed around the two panels and ink distressed with Brushed Corduroy Distress Ink (Ranger). I didn't have Chocolate Twill, so I dyed mine with a dark brown copic. The star is also a scrap chipboard piece colored with a copic.

Thanks so much for stopping by. I truly hope you're having a fantastic week!!
Happy Stamping!!

Supplies:
Stamps - Giddy Up! (Sugarnellie), sentiment (old Stampin' Up)
Paper - 29th Street Classic Unique and Signature Life His "Lil Cowpoke" (My Mind's Eye), Mystic Medium and Suede Brown Dark (Prism), White (Papertrey)
Accessories - Chipboard star, Copics, Twill, Stitched ribbon (SU), sewing machine, twine, scotch mounting tape

Tuesday, July 22, 2008

Dirty Dog!!

One layer cards? So not my forte. Now I've made them in the past (3 times), but only if they're a challenge...not because I just decided to make a one layer card for the fun of it. PAHLEASE!! Talk about stepping out of my comfort zone!!

Well, since today is Dare To Get Dirty on SCS, I decided to try to combine all three of today's challenges. Michelle's - Masculine, JulieHRR's - Basic White, and Christine's - Watercolor.

You can only see the other cards if your a fan club member, so go down to my previous post and learn about how to sign up.

Now, my DH is always in the doghouse, but this card could be for any guy that is a *stinker*. Believe me, I'm surrounded by BIL's, friends, even my son, that can be terribly ornery. And this card would be perfect for them. I think it could even be for those gf's that have an ornery side to them....I have a few of those too. LOL

For this card I used my scorepal to make the top look like bricks, watercolored my doghouse, and ink distressed the edges with slate (Adirondack). There's a slight colorwash behind the doghouse that is more visible irl. I also used a decorative scissors to cut the bottom of my card...you know dogs and their chewing habits...*grin*

Supplies:
Stamps - Dog Lover (Inque Boutique)
Paper - White
Ink - Black Onyx (Versamark), Chocolate Chip, Cranberry Crisp (Stampin' Up), Slate (Adirondack)
Accessories - Black embossing powder, waterpen, SU reinkers, Key Tag Punch (SU), Cranberry Crisp stitched ribbon (SU), eyelet (making memories), crop-a-dile

DTGD with Michelle!!

Today it's time to Dare To Get Dirty with Michelle (sf9erfan) on SCS. This is the sample I made for her masculine challenge.

Click HERE if you want to learn more about SCS's Fan Club and how to join. There's going to be a whole week full of challenges (about 20) to participate in. Not only that, there are prizes too.

The Steam Engine (Rubber Soul), can be found at Stamper's Dream.


Supplies:
Stamps - Steam Engine (Rubber Soul), sentiment (old SU stamp...not sure what set), Behind sentiment (Bronc Buster - SU)
Paper - Time flies dp, Black, Birchtone Dark (Prism)
Ink - Black Soot (Ranger Distress), Latte (Adirondack)
Accessories - SU hardware, piercing tool and template, Scotch mounting tape

Monday, July 21, 2008

DTGD08 with Laurie!!!

Splitcoaststampers.com is having Dare To Get Dirty with the Dirty Girls challenges all this week in the Fan Club. Current DD's and Alumns will be hosting, and there are prizes!! Woo-Hoo!!! If you're not a member, you can sign up HERE. It's so much fun to see what others do with the challenges. HERE's a link to the challenges.

Laurie issued a challenge to use vellum, and bling if you'd like. I was one of the sample makers, and this is what I came up with. The name on the right is spelled correctly. It's not Tracey...just so ya know....*grin*

You can find the Suspension tutorial HERE.

JustRite Stampers Monogram Kit can be found HERE:


Supplies:
Stamps - JustRite Monogram Stamper, and small letters
Paper - Creative Imaginations, Ivory (Prism) Bravo Burgandy, Black (SU)
Ink - Black Onyx (Versamark)
Accessories - Black embossing powder (Judikins), brad (Anna Griffin), Lace, Ribbon, vellum, nestabilities (Spellbinders), dental floss

Sunday, July 20, 2008

Tea Staining Technique

This month is all about techniques with the CCEE group. And this week we were to use Tea Staining. We also had to have music somewhere on the card because this is also the week we choose a Catchy Name on SCS. CNFS. jazztobi is the name we're featuring today!

If you'd like to see what the other girls did with this technique, click HERE. We'd love to have you play along with us too. See what kind of paper you can create!

All my bg's and my butterfly were tea stained. I know...what's with the bluish purple look? Well, I didn't like the look of my paper that I soaked in tea for like, forever. So I took my flavored teas by Stash (Chocolate Hazelnut, Pomegranate raspberry green tea, and acai berry herbal tea, dropped them in boiling water for about a minute, took them out and dripped them all over my paper. I thought the paper would turn out brown and red. Nope, This is the result. WAY COOL!! I loved the look!! I stamped the music bg from Unity Stamp Company on the bg panels with Latte (Adirondack), and ink distressed them with Frayed Burlap (Ranger Distress Ink).

The Sunflower (Paper Inspirations) and butterfly (Inque Boutique) were thumped. I inked up the entire flower image with More Mustard (SU), and colored and thumped with Really Rust, Bravo Burgandy, and Chocolate Chip (SU). The leaves and stem were thumped with Always Artichoke and Chocolate Chip (SU). After getting the image inked up, I spritzed it twice and stamped it on Vanilla Cream (Prismatic) paper. The butterfly was inked up with Wild Wasabi, Rock -n- Rolled in True Thyme and thumped with Always Artichoke and Ballet Blue (SU).

The Inque Boutique sentiment was stamped with True Thyme (SU).

Here's a close up so you can see the dimension and sparkle.
The flower center has a mixture of Coffee and
Cinnamon Stickles. I also added a bit of sparkle to the leaves
and petals with my Quickie Glue Pen and Ultrafine Crystal Glitter. I found the charm at Walmart in the jewelry section, and the little pearl is by KaiserCraft.

I'd like to take this time to tell you how awesome Prismatics are!! I'm in paper heaven!! They are textured on one side, and smooth on the other. And the soak up ink divinely. I loved staining these papers. I've also just sponged the paper directly and rubbed the ink pads directly on it. All with awesome results. Michelle at Stamper's Dream will have it in stock very soon, so keep checking her store. Love the stuff!!


Supplies:
Stamps - Sunflower (Paper Inspirations), Butterfly, sentiment (Inque Boutique), Music bg (Unity Stamp Company)
Paper - Herbal Garden Light and Medium, Twilight, Vanilla Cream (Prismatics)
Ink - Latte (Adirondack), Frayed Burlap (Ranger Distress), More Mustard, True Thyme - sentiment (Stampin' Up),
Accessories - charm, stickles, sewing, pearl, glitter, organdy ribbon, corner rounder, scotch mounting tape

Friday, July 18, 2008

A much needed break!

I made this card awhile back, and wanted to share it with you today. I love these new images by MFT. Annie LaPoint is quite the talented designer. Her images are fabulous. This one is called Take a Break. It's darling, and so much fun to color and paper tole. The tub and flowers are popped up with dimensionals, and the edges are ink distressed with Latte Adirondack ink. I also sewed a bit around the panel edges, and randomly across the top.

Have a FABULOUS weekend. I hope it's stamping inspired!! ;)

Thanks so much for stopping by.


Supplies:
Stamps
Paper - White, Suede Light (Prismatics), Lucky n Love (Black Market Paper Socitey) White (Papertrey)
Ink - Black Soot (Ranger Distress Ink), Latte (Adirondack)
Accessories - Copics, Pearls (Kaisercraft), Nestabilities (Spellbinders), scallop scissors, Quickie Glue Pen, Ultrafine Crystal glitter, sewing machine, Scotch Mounting tape

Thursday, July 17, 2008

The same yet different...

I've made two cards for you today. Both have the same, very simple layouts. Both use the same amount of layers. And both use very similar images. Yet, both have a totally different feel.

I don't usually use simple layouts. I struggle with that concept. So if I do, I almost always *amp* them up a bit with layers. Don't get me wrong...I LOVE simple layouts when others use them. I seriously covet that gift. They just never seem to look right when I make them. I even struggled with my second card here. It feels like it's missing something. But, I forced myself to STOP!!

So, onto the cards....
Both cards were made with my new JustRite Monogram stampers kit. I'm having a blast with it. It's so easy to use and the possibilties are endless. I also know that they're coming out with a slew of new designs that they are debuting at CHA. Yee-Ha!! I've made another card with a different set and technique that I'll show you on Monday. What fun.

Oops...back to these cards. They're pretty self explanatory. For this first one, I used the Damask Border with the standard font. I then added some bridal ribbon trim that I got at JoAnn's, some Heidi Swapp Icee bling, and a tiny clear dew drop. I ink distressed the edges a bit with Ranger Frayed Burlap Distress ink, and poped up the layers with Scotch mounting tape.


Here's a side view so you can see the dimension.
I'm all about dimension!! *grin* The main panel is also popped up a bit from the back of the card.


So, Now for the next card I made with the exact same layout, the exact same layers, and with the JustRite Monogram Stampers Kit.This one is even easier. The only dimension on this card is the monogram itself. Each layer is raised.
Sorry about the slightly crooked ribbon. Once my double stick tape is down...it's down. And I was in too much of a hurry to get this one done. *groan*

You can get these kits at Stamper's Dream, and Michelle has FREE SHIPPING for domestic orders over $75.

Supplies:
Stamps - JustRite c-45 Monogram Stampers Kit, Damask Borders
Paper - Grunge (Kaisercraft), Blue Awning Damask (K&Company)
Ink - Frayed Burlap (Ranger Distress Ink)
Accessories: Nestabilites, ribbon, dew drop, Scotch Mounting Tape, Rhinestone stickers

Sunday, July 13, 2008

Faux Silk Technique

It's time once again for a CCEE challenge. This whole month we're focusing on techniques. And, this week we were to try the Faux Silk. Beate gives a fabulous tutorial for this on SCS. It's really easy. I tried to get a close up so you could see what it looks like, but my photography skills are lacking, and I couldn't get it to work. This is the best I could do.

As I said earlier, we were to use the faux silk, and we get bonus points for adding an owl. We're hoping Hoots (StampOwl) will give us a prize since we dedicated this weeks theme to her passion for owls. *grin*

If you'd like to see what the other girls did for this challenge, check out our CCEE Stampers Blog. You can play along too. We'd love to see what you come up with!! All you have to do is follow the instructions there.

First off, the card is only 4"x4". The owl is Studio G and is colored with copics. I also Paper Toled him to give him the dimension the rest of the card has. He's small enough already. I'd hate to give him more of a complex. The circles were all cut with nestabilities, and are paper pierced. I stamped the bg on white tissue paper, colored the flowers with copics, and then stamped the Sanded bg from SU with Latte (Adirondack) over it all to roughen it up a bit. I also ink distressed all the edges with Latte.

To finish it off, I added a variety of rhinestone stickers: flower (Hero Arts), Teeny Tiny ones (Amuse Creative Candy), Corner ones (K& Company) The ribbon is offray.

I used all Prismatic Papers!! LOVE this stuff!! The texture is fantastic, and it inks beautifully. I used their Baby Pink Light and Medium, the Suede Brown Dark, and White (All Prismatics)
Guess what!!
I'm so excited to tell you...Michelle at Stamper's Dream is going to be carrying Prismatics!! Woo-Hoo!!! If you haven't tried this paper yet, believe me, you're missing out. One side is textured, the other side is smooth. And it's a fabulous weight too. I'll let you know when it's available at her store!!

Supplies:
Stamps - Studio G, Sanded (Stampin' Up)
Paper - Baby Pink Light and Medium, Suede Brown Dark, White (Prismatics), White (Papertrey)
Ink: Espresso and Latte (Adirondack)
Accessories - Copics, tissue paper, piercing tool, Mat Pack (Stampin' Up), Nestabilities (Spellbinders), Tag and Photo corner punches (Stampin' Up), Rhinestone stickers, Offray ribbon, Scotch dimensional tape, make-up sponge

Tuesday, July 8, 2008

Just Beachy!!

When Michelle (Stamper's Dream owner) got these new Impression Obsession Images...Oh, my...I fell in love!! They're whimsical (not usually my style), but oh so fun and cheery and....round!! I loved their shape. So of course I just had to have them. This is my first card with one of the images that I now have. It's called Beach Day. I'll have a few more to show you in the near future.

In the photo, it looks like the bg is blue, but it's actually an eggplant color. I so need to get a photography tent....soon, very soon!

The image is colored with copics and the sun, umbrellas and sandpail are lifted with Scotch Mounting Tape. Here's a close up so you can see the dimension and the touch of sparkle

that I added with my Quickie Glue Pen
and Crystal Snow (Stampendous). I love the depth and hint of sparkle that Paper Tole and glitter can give to a project!!

Supplies: Stamps - Beach Day (Impression Obsession) Paper - Bazzill, White (Papertrey) Ink - Black Soot Distress Ink (Ranger) Accessories - Copics, Quickie Glue Pen, Crystal Snow, Nestabilities, Scotch Mounting Tape, Sparkle Brads (Making Memories)

Sunday, July 6, 2008

July Techniques ~ Thumping

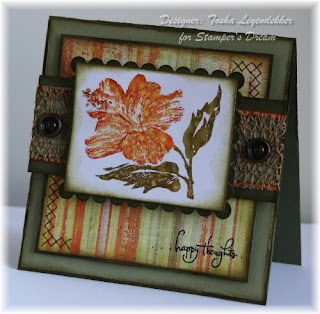
July is Here already!! Wow, this summer is going fast!! With a new month, comes a new set of challenges. I got to choose the challenges for our CCEE group this month, so be looking for different techniques each Monday.Since one of my favorite techniques is Thumping, what better way to start off the month. *grin* Thumping is so easy and it gives your image nice depth. Check out the THUMPING tutorial on SCS. Beate explains it better than I could. If you would like to see what the other girls have done, check out our CCEE Stampers Blog. We'd love to have you participate too. Just make a card using the Thumping technique and post a link in the comment section of our CCEE blog. If you post it on SCS, put CCEEC in the keyword section so we can see what you've done!! Now to the details of the card...I inked up my this gorgeous Penny Black Hibiscus image in More Mustard, and thumped portions of the flower in Really Rust. I colored the leaves with Old Olive and then thumped them with Always Artichoke. To get the best effect, I spritz my image with only two spritzes of water using the Judikins Extra Fine Mist Spritzer. I found that this bottle gives the finest and most even water distribution.I added a touch of sparkle to the flower with Frosted Lace and Copper Stickles. The sentiment is Everyday Whimsy by Wordsworth. I love the font! I added some faux stitching to the corners with a SU Chocolate Chip Marker, and covered my middle panel with this fabulous thread woven ribbon by May Arts. I had never seen it before. My friend Lori sent it to me, and informed me that Michelle at Stamper's Dream should have it in her store soon. I LOVE this stuff. It looks like burlap or even mesh, but it's really soft. All my edges are ink distressed with Ranger's Frayed Burlap Distress Ink, and I slightly distressed the edges with my bone folder. The panels are also each lifted with Scotch Mounting tape. Supplies: Stamps - Hibiscus (Penny Black), Everyday Whimsy (Wordsworth)Paper - 29th Street (My Minds Eye), Always Artichoke, Mellow Moss (Stampin' Up) White (Papertrey)Ink - More Mustard, Really Rust, Old Olive, Always Artichoke (Stampin' Up), Frayed Burlap Distress Ink (Ranger)Accessories - Frosted Lace and Copper Stickles, Judikins Fine Mist Spray Bottle, Brads (Making Memories), Ribbon (May Arts), Nestabilities, Scotch Mounting Tape

Featured Flourish ~

I haven't done a Featured Stamper challenge from Splitcoaststampers for a very long time. I had some time today, and thought why not? However, Teneale had so, so many cards that I would've just loved to CASE!! What an amazing gallery. If you get a chance, check it out. You won't be disappointed. I CASEd this CARD. When CASEing, you are required to change at least two things. I used different images, and colors, and I also Paper Toled and Ink distressed mine.

I loved how she took the main image on the top and stamped her bottom panel with it. I did the same. The bottom panel is actually the diamond from the top stamped over and over to cover the paper.

I received these gorgeous Anna Griffin Flourishes from my SIL awhile back, and am just now getting around to using them. I know...sad isn't it? But after using them just this once, I know I'm going to keep coming back to them. They are gorgeous!! The sentiment is from the Aged and Elegant Inque Boutique set.

Supplies:
Stamps - Flourishes Clear Stamp Set (Anna Griffin), Aged and Elegant (Inque Boutique)
Paper - Vanilla Cream, Suede Brown Dark, Suede Brown Light (Prismatic)
Ink - Latte, Espresso (Adirondack)
Accessories - Hardware (Stampin' Up) Rhinestone Gelly Gem (gel-a-tins), Scotch Mounting Tape, piercing tool, mat pack (Stampin' Up), sponge

Thursday, July 3, 2008

Going Masculine~

I just wanted to give a little shout out for Michelle's store Stamper's Dream. She's offering free shipping on domestic orders over $75!! And you can upgrade to priority for $3.50. Way cool. Love a good deal on the shipping!!

I do realize Father's Day is long past, but I didn't get an opportunity to upload this card until now. I made this for my Father-in-Law, but it could easily be used for your favorite hunter, or a birthday card for a guy too.

This was pretty easy. All I did was stamp this Diamond Buck by Northwoods with Espresso (Adirondack) ink onto Kraft (Stampin' Up) twice, and colored him with copics. I then cut one buck out and layered it on top of the other so I could make his antlers pop our a bit more.

The Always Artichoke (Stampin' Up) panel is embossed with the distressed stripe Cuttlebug embossing folder. I hand wrote the sentiment, and finished it off with a neatly tied knot of May Arts Chocolate Satin ribbon.

All the panels are raised with Scotch Mounting tape.


Supplies:
Stamps - Diamond Buck (Northwoods)
Paper - Chocolate Chip, Always Artichoke, Kraft, Very Vanilla (Stampin' Up)
Ink - Espresso (Adirondack), Vintage Photo Distress Ink (Ranger
Accessories - Cuttlebug, brads, sponge, dimensional tape, Copics
Related Posts Plugin for WordPress, Blogger...
 
Site Design By Designer Blogs