Showing posts with label Felt. Show all posts

Friday, April 8, 2016

Power Poppy's Birthday Layer Cake


Hello Friends!!  I'm excited to share another Power Poppy card with you today!  Have you seen the newest digi called Layer Cake?  It's absolutely darling!!!   I love all the layers with the sweet banner that you can customize with whatever you want it to say because it's digital.  I added one of the sentiments to the bottom using Photoshop too.  I'm really starting to get the hang of this digital stuff.  *grin*

I colored the cake with Copics, and wanted to add some sparkle and dimension to the candy dots, so I used an Ice White Pearl Pen (Viva Decor) and sprinkled Dazzling Diamonds glitter (SU!) over it before it dried.  I also added some Glossy Accents to the glass plate and ink distressed the border with some Antique Linen Distress Ink.  To vintage it up, I distressed all the edges and added some elegant stick Pens along with some pearls and felt hearts.


That about sums up my card for today.  For some more Power Poppy inspiration, check out the following Bloom Brigade Blogs:
CopicsCake ~ R85, R83, R81, BV20 Banner ~ R00, R000 Cake Plate ~ C2, C0

Thanks for dropping by!  Have a fantastic weekend!

   Happy Stamping!
______________________________________________________________________________

StampsLayer Cake (Power Poppy)
Paper:  X-Press It, sofiero Royal summer recidence (Maja Designs)
Ink:  Printer, Antique Linen (Ranger Distress)
Dies:  Timeless Rectangle (Spellbinders), Primitive Hearts #3 (Sizzix)
Accessories:  Copics, Felt, Seam Binding, Stick Pins (Littlescrapshop.etsy, Teresa Collins), Pearls, Pearl Pen (Viva Decor), Dazzling Diamonds Glitter (SU!), Glossy Accents (Ranger), Sewing Machine, Distrezz-it-All 

Saturday, September 27, 2014

Waltzingmouse Stamps September Release Previews ~ Day 3

 For my Power Poppy post, click HERE.


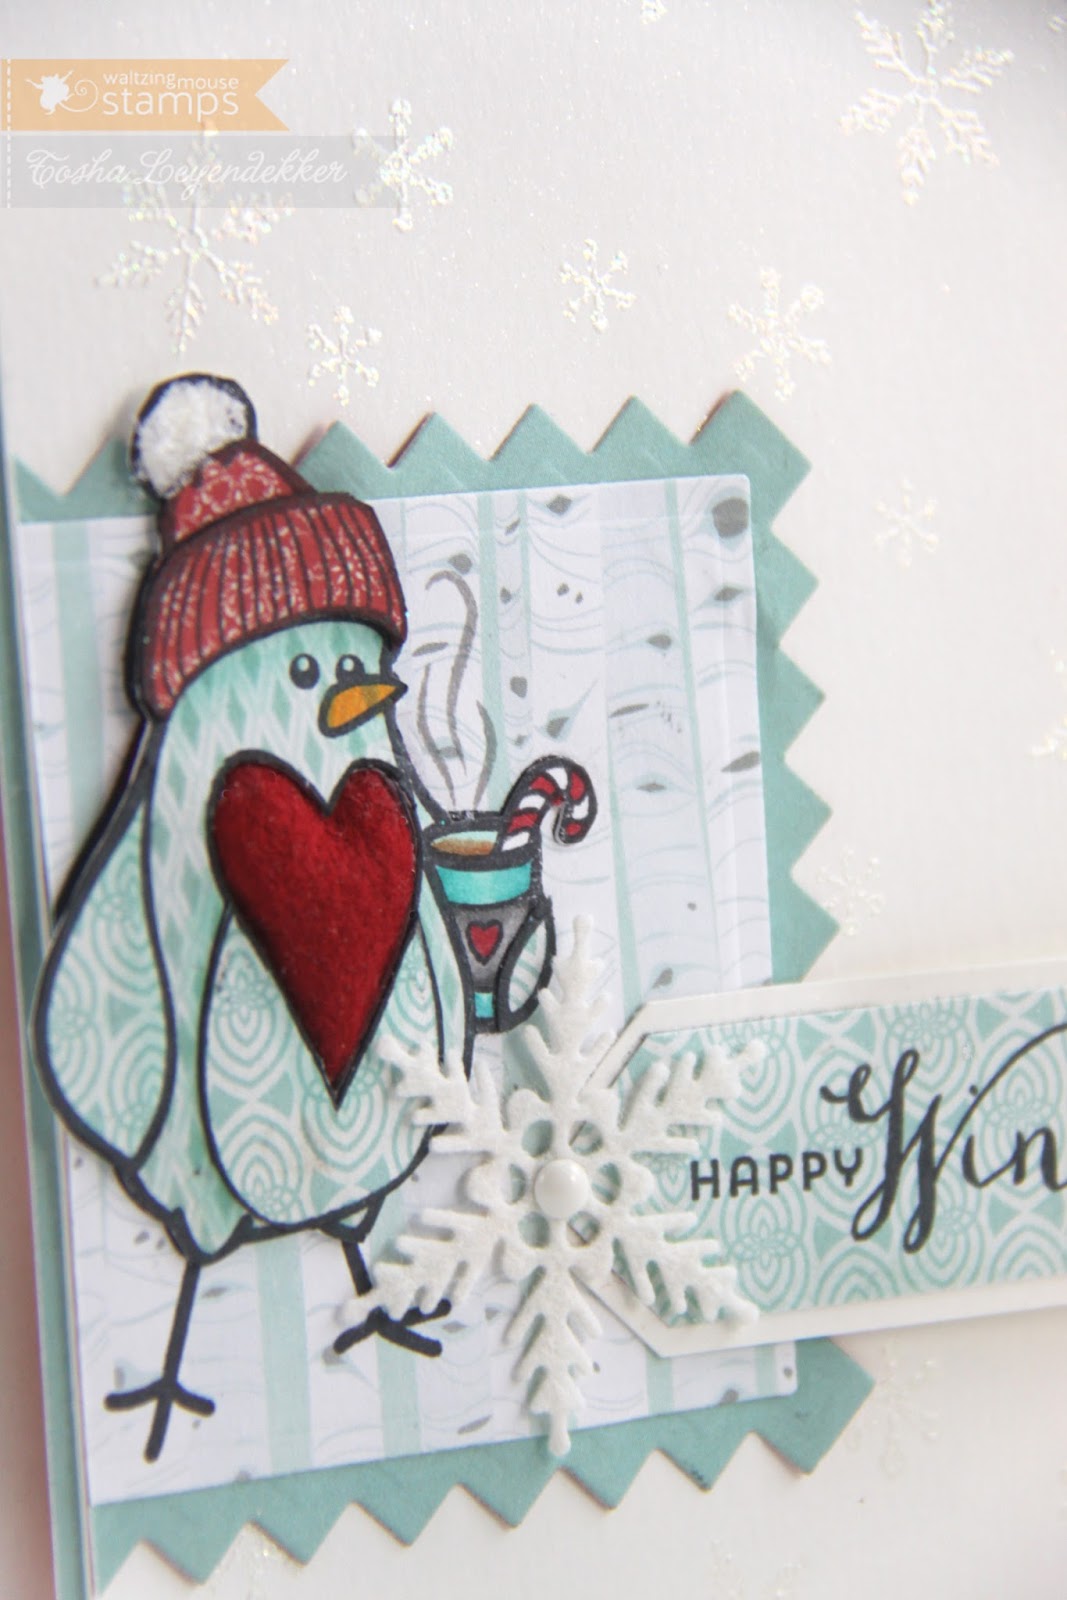
Hello my creative friends!!  Welcome to Day 3 of Waltzingmouse's September Release Previews!  I hope you've been enjoying our Christmas inspirations!  Today I'm excited to share another charming set called Warm Fuzzies!!  Just the name alone makes ya all cozy inside, and this set oozes warmth and charm.  I paper-pieced the larger bird and and cut out the heart so I could insert a puffy felt heart.


Here's a closer view so you can see the dimension of the heart better, along with the piecing and sparkly flakes that are also included in this set.


The flakes just happen to match a couple of the new WMS diecut snowflakes too.  Snowflake #1 and Snowflake #2.  I diecut the #2 Snowflake out of felt and added an enamel dot to the center.


I wanted to use the #1 Snowflake and the little bird on a felt mitten, so I diecut two mittens (Spellbinders), sewed them together, and added the snowflake and little tag that I diecut using the smallest WMS Stitched Tag die.  The little guy was colored with Copics.


That sums up my project for today.  Here's a list of all the WMS design team members so you don't miss a thing!!


Thank you for dropping by, and for your encouraging comments.  Tomorrow is the release and the DT will be putting on a hop to inspire you a bit more.

    Happy Stamping!
__________________________________________________________

StampsWarm Fuzzies (Waltzingmouse)
Paper:  Keepin' Cozy (EP), Cryogen White
Ink:  Tuxedo Black (Memento), Versamark
AccessoriesStitched Tags die (WMS), Snowflake #1 and #2 dies (WMS), Mitten and Square Swatches dies (Spellbinders), Felt, Copics, Twine, Snowflake Tinsel Embossing Powder (Ranger), Rhinestone (Kaisercraft), Enamel Dot (Teresa Collins), Twine, Candy Canes, Flower Soft 

Friday, January 25, 2013

Puffy Felt Heart SCS Challenge


The "Free For All" Challenge over on Splitcoaststampers today, is to get all warm and fuzzy.  Now, living in California, I don't get an opportunity to wear mittens or sweaters because it's just too warm for them here.  So, when I read "fuzzy", I thought felt.  And since Valentine's Day is right around the corner, I thought I'd make my daughter a "warm and fuzzy Valentine".  

I just diecut a Heart (Spellbinders) out of white cardstock, and framed it with a Postage Stamp die (Spellbinders).  I then tucked a piece of red felt behind the negative heart space, poked it through a bit and stuffed a half of a cotton ball behind it to poof it out a bit.  I then backed it with another piece of white cs and sewed around the heart...poorly...but thankfully my daughter isn't as much as a perfectionist as I am, and will accept the sewing flaw.  I just didn't have the time to start all over.  *sigh*.

Anyway, lastly I added a sweet "love you" sentiment from the Waltzingmouse set Compact Family, a trio of ribbons, some twine and a little button.


That's it for today's project.  It was fun working with felt again.  I hadn't done that in awhile.

Thanks for visiting.  I hope you have a fantastic weekend!
Happy Stamping!
____________________________________________________________

Stamps:  Compact Family (Waltzingmouse Stamps)
Paper:  White (PTI)
Ink:  Onyx Black (Versafine)
Accessories:  Felt, Heart and Postage Stamp dies (Spellbinders), Ribbon, Twine, Button (PTI), Sewing Machine

Tuesday, November 6, 2012

Felt Gift Bag


Did you get an opportunity see the new Waltzingmouse Stamps released this month?  If not, you'll want to head on over to the store and check out all the new goodies and some inspirational projects to help enable you.  (*wink*)  Claire has designed the sweetest new Candy Wagon set.  I made a card using the wagon for the release, and it was a delight to work with.

I'm going to an art retreat soon and I thought it would be fun to make little goody bags for those joining me at my table for the "Meet and Greet" the first evening.  I made these bags last year at about this time using paper and felt.  I just changed the image, border and decorations.  You can find the tutorial HERE.  They're a perfect size to hold two Ghiradelli squares.  I'm only showing 4, but I made 10, and they go together pretty easily.

I used Spellbinders' Classic Petal Edgeabilities for the border, and their Create-A-Flake 3 die for the button embellishment.  I also used a red Gel Pen (Viva Decor) for the center of the wagon...with a little crystal glitter for some fun.  The flakes are also covered in glitter.

That's about it.
Hope you're having a great week!
Happy Stamping!


post signature
_________________________________________________________________

Stamps:  Candy Wagon (Waltzingmouse)
Ink:  Onyx Black (Versafine)
Accessories:  Felt, Sewing Machine, Classic Petal Edgeabilities and Create-A-Flake 3 (Spellbinders),Jingle Bells, Twine, Red Gel Pen (Viva Decor), Crystal Glitter

Tuesday, March 16, 2010

Felt Flowers on a tag

Sorry I've been absent for such a long time. I've been spring cleaning. Going through my closets and cupboards and purging stuff that's been sitting idle for almost a decade. What a good feeling to get a bit more organized. Notice I said "a bit"...LOL I still have some to do, but I've conquered a mountain. *grin*

So...now about my project...

Stamper's Dream has some fabulous new toys coming in often and I was so excited when I got my hands on the new Maya Road Canvas Tags!! Talk about fun to play with. I started by painting Chocolate Acrylic Paint (Making Memories), on my Music Cover~a~Card Cling Background Stamp by Impression Obsession, with a foam brush. Stamper's Dream also carries IO's new Mega Mount Rocker Block, that makes stamping these large bg's easy as pie. You get perfectly straight images every time!!

Okay, after getting my musical bg on the canvas, I brushed on some Versamagic colors: Sea Breeze and Pink Petunia, and Brilliance colors: Pearlescent Beige and Pearlescent Crimson. I then sprayed Ivory Crocheted lace with Latte Metallic Maya Mist by Maya Road, and layered it on the tag with a strip of Pink Sheer Ruffle edge ribbon.

Next is the main image. The sentiment (from the JustRite set Harmony Classic Circle III) was stamped with Black Onyx Versafine onto Ivory Simply Smooth cardstock. I stamped one of the images from Tim Holtz's Slight Alterations set with Pearlescent Beige (Brilliance) to distress it up a bit, and sewed around the edges. Finally, I added some felt flowers and flourishes and a felt ribbon flower I made. Stamper's Dream has quite a variety of fun ribbon, and the curly-q's were made with a pink wired string by May Arts. Fun stuff. And the bottom loops are by Webster's.

That's it as far as the tag goes. It sounds really involved, but it came together rather quickly.

Now, in my last post I mentioned that I was going to the hills to visit a stamp store with two sweet and nutty friends: Pat Smethers ~ SCS and Nat (flatbdgrl ~SCS). The store is called Cat's Meow, and it's just that. It's in Oakhurst, California and has a fabulous variety of stamps, paper, and embellishments! And two adorable and friendly cats. Sweet and talented Melissa Cash works there and was kind enough to join us for lunch. As you can tell by the photos below, we had a fabulous time!! I know...scary huh? The mustaches are wax and smell like grape. YUM!!

Pat, Tosh, Nat


Pat, Melissa, Tosh, Nat


Well, the drive up there was stunning. The wild flowers were putting on quite the show, and the company was a delight. What a treat! Oh...and we got some fabulous new stampin' toys too!! Woot!

Thanks for stopping by! I hope your week is going smoothly and is filled with treasured moments!!
Happy Stamping!
Tosh
Related Posts Plugin for WordPress, Blogger...
 
Site Design By Designer Blogs