Pages

Wednesday, July 30, 2014

Power Poppy August Release ~ Day 4


http://powerpoppy.com/products/countryside-bouquet-deluxe
It's time to share another new set by Power Poppy today, and this is one of my faves.  Who am I kidding...I love them all, so I really can't say I have a favorite.  So, I'll just say this set is super fun to color and has a plethora of ways to use it.  

Last month, Power Poppy released a digital image of the most beautiful Countryside Bouquet.  Well, now you can get it in stamp form, and Marcella has included a trio of the 3 flower varieties along with some charming sentiments.  It's called Countryside Bouquet Deluxe

I have these darling little kraft envelopes that are perfect for little gift cards or notes of encouragement.  So I thought it would be fun to use one of the flower sprigs for a cheerful "hello".  The card is only 2 7/8" x 4".   I stamped the image onto Cryogen White cardstock with Tuxedo Black Memento ink, and colored it with Copics.  I then aged it by covering the entire image with Antique Linen Distress Ink (Ranger), and the edges with Vintage Photo and Walnut Stain Distress inks.  I diecut the border using A2 Curved Borders One (Spellbinders), and added a sweet little tag that I diecut using Back to Basics Tags (Spellbinders).  The scored border was created by using my Scor-Pal.

That sums up today's project.
Be sure to check out what the rest of the Bloom Brigade has to share today.  You won't want to miss it!

Here's a list of the Copics I used today:  R07, R05, R02, YR04, Y08, G28, G24, G21, T3, T1, T0 

Thanks for visiting today.  I don't have a project to share tomorrow, but be sure to stop by on the first for the Power Poppy Hop!!
     Happy Stamping!
_________________________________________________________________

Stamps:  Countryside Bouquet Deluxe (Power Poppy)
Paper:  Vintage Cream and Kraft (PTI)
Ink:  Tuxedo Black (Memento), Antique Linen, Vintage Photo and Walnut Stain (Ranger Distress Ink)
Accessories:  Copics, A2 Curved Borders One and Back to Basics Tags dies (Spellbinders), Twine, Button (PTI), Scor-Pal 

Tuesday, July 29, 2014

Happy 25th Anniversary ~ the best is yet to be!


I'm sharing this project over at the Team Talk Inspiration blog today, and normally I would share just a sneak peek here on my blog, but, in just a few days, my husband and I will be celebrating our 25th Wedding Anniversary, and I just wanted to share that here too.  I've never seen my husband without a mustache, so I knew I wanted a make a card using the mustache stamp from the WMS set My Kind of Guy.  And, being that he's a farmer, I also wanted to make my card rustic.  So I used the Woodgrain set for the background, along with the Woodenheart Alphabet and the fun Playful Pinwheels set,  because of it's playful sentiments.  We rarely act super serious.


I started by die cutting out a square from my main panel, and stamping it using the Woodgrain background stamp.  I then added some wood texture to it by embossing it with the Spellbinders M-Bossabilities Bricks and Bark folder, and sanding it.

For the weaved background, I laid double stick tape around the edges of the opening and laid out strips of twine to weave.  After weaving it, I laid another square of kraft card stock, that I had diecut the same size square out of, on the back of it to hide the leftover weave strands.  To the bottom corner, I added a "wooden nickle" type sentiment with a 1" punched circle that I had stamped with the Woodgrain background first.  I added the number "25" along with the abbreviation "No." to the nickle.  I had to add the sentiment "the best is yet to be"...because frankly, I truly believe our marriage just gets better and better with time.


The "date" stamp, from the My Kind of Guy set, fit perfectly to include our wedding date, and that sums up my card.  I hope I've inspired you to get out your Waltzingmouse Stamp sets and mix 'em up a bit.  That's one of the many reasons I love Claire's stamp sets so much.  There are endless combinations!!

Happy Stamping my friends!!
__________________________________________________________________

Paper:  Kraft and Vintage Cream (PTI)
Ink:  Onyx Black and Smokey Gray (Versafine), Tea Leaves and Jumbo Java (VersaMagic), Olive Grove and Pistachio (Memento), Walnut Stain and Black Soot (Ranger Distress)
Accessories:  Square dies and Bricks and Bark Embossing Folder (Spellbinders), 1" and 1 1/8" Circle Punches (SU!), Twine, Library Clip (SU!), Mini-Paper Clip and Mini-Stapler (Tim Holtz), Metal Studs (Basicgrey), Sanding Block

Power Poppy August Release Preview ~ Day 3


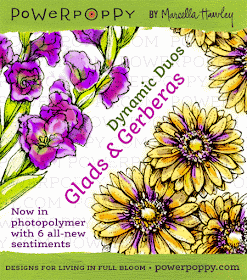
Hello Power Poppy friends!!  Have you been enjoying the peeks?  Have we enabled you yet?  Well, we are sharing the stamp version of the Glads and Gerberas that were released as digitals in May.  That's right, for those of you that like to ink up your images, you will now be able to have these two flowers, along with a variety of sentiments that fit perfectly with the flowers.  The set is called: Dynamic Duo: Glads and Gerberas.

Now, I have two cards to share with you today, and there's a story behind just why also.  In the one above, you will see primarily white Gerberas, with a hint of shadowing in the background, turquoise centers, and a charcoal gray stripe along the side.


For my second card, I colored the trio three different colors and added a aqua stripe to the side panel.  Okay...have you ever battled with an image thinking it had you whipped?1?!  Don't get me wrong...Gerberas are one of my favorite flowers, and Marcella has designed them beautifully.  I made a card with them in May and thoroughly enjoyed coloring them.  You can see that card HERE.

Well, I wanted to try my hand at a more modern graphic card with this trio, and it gave me fits.  I literally colored this set 13 times, fussy cut the blooms 6 times, layered, burnished, added fun flock, stickles, rhinestone centers, and none of them fit with the look I wanted.  I finally decided on solid colored petals.  No shading what-so-ever.  And then...would you believe I ended up with two that I liked and couldn't decide which one to use.  First I couldn't make even one I was happy with, and now I have two.  So, what's a stamper to do, but make 2.

I created the striped border using Copics that coordinated with the colors I used on the flowers.  Each sentiment panel was colored with a Copic before stamping the sentiment onto it also.  And lastly, the base panel was embossed with a polka-dot embossing folder (Cuttlebug).

So, there you have it...my struggle with these two cards.  But it was worth it.  I'm happy with the result, and now I have two cards.

Here's a list of the Bloom Brigade participants today.  If you haven't visited their blogs yet, you, my friends, are missing out.  These gals are uber inspirational!!


Here's a list of the Copics I used too:  BG13, BG11, T5, T3, T1


____________________________________________________________

Stamps:  Dynamic Duo: Glads and Gerberas (Power Poppy)
Paper:  White and Smokey Shadow (PTI), X-Press it Blending
Ink:  Tuxedo Black (Memento)
Accessories:  Copics, Long Classic Rectangles (Spellbinders), Dotted Embossing Folder (Cuttlebug), Sequins (Teresa Collins), Corner Rounder, Quickie Glue Pen, Glitter 

Monday, July 28, 2014

Power Poppy August Release Previews ~ Day 2


http://powerpoppy.com/products/sunny-harvestIt's Day 2 of our Power Poppy Release previews, and we are sharing a set called Sunny Harvest.
It's just full of beautifully charming images that just make you wish Fall were here.  Seriously folks, Fall is my absolute favorite season, and working with these images...well, lets just say, I'm not happy with the 100+ degrees that we're sporting right now.  I'm ready for the crisp air and cozy colors Fall brings......NOW!!  Okay, enough of my pouting.  I can't help but smile when I talk about this set.

I had never known what Chinese Lanterns were.  I've seen them in Fall decorations, but never gave a thought to what their name was.  And Marcella, being the gem that she is, has introduced us to these beautiful Fall plants.  I love distressing (I know...it's a shock), so I had to use my Kraft cardstock with my distress inks with this set...duh!!!

I started by coloring the Lanterns and Bittersweet with Copics.  I colored an extra set of lanterns so I could layer them.  I hand cut the image (not recommended for impatient cutters...this baby took awhile and my peepers will never be the same.  I think I need new readers...YIKES!)  Anyway, after cutting them out, I burnished the backs of the Bittersweet and Lanterns and took a stylus to the front lines of the lanterns to give them dimension.  I popped them up in the die cut frame, and added some texture to the frame and background with the Bricks and Bark M-Bossabilities folder by Spellbinders.

I also sewed a lace and fabric ruffle to add to the bottom of my card and added a wooden button, burlap trim and a twine bow.


Here's a close up so you can see a bit of the dimension of the lanterns.  They're really "puffy" irl...super fun.

Now, in case you haven't seen the rest of the Bloom Brigades' projects, here's a list of all those participating today.

Here's the list of Copics I used:  R39, R37, R35, R32, YR18, YR16, YR07, YR04, Y35, Y08, E37, E35, E31

Thanks for dropping by!!
       Happy Stamping!
_________________________________________________________________

Stamps:  Sunny Harvest (Power Poppy)
Paper:  Kraft and Vintage Cream (PTI) Cryogen White, Wood (MME)
Ink:  Tuxedo Black (Memento), Black Onyx and Smokey Gray (Versafine), Vintage Photo and Walnut Stain (Ranger Distress)
Accessories:  Copics, Deckled Rectangles and Standard Rectangles dies, Bricks and Bark M-Bossabilities folder (Spellbinders), Metallic Dots (MME), Burlap Ribbon and Trim, Wooden Button, Twine, Lace, Fabric, Sewing Machine 

Sunday, July 27, 2014

Power Poppy August Release Previews ~ Day 1


http://powerpoppy.com/products/farmers-market
Hello friends!!  I hope you are having a fantastic weekend!!  I have been having a fabulous time coloring some more Power Poppy images, and I can't wait to share them with you.  Can you believe it's time for another release?  Is August really around the corner?  Where does time go?

I know I must sound like a broken record, but I truly wait on "pins-and-needles" for each of Marcy's releases.  I impatiently look forward to seeing what that creative, artistic brain of hers comes up with next.  Well, like all the others, this release is full of beauty and charm.

Today we are featuring the sweetest, set called Farmer's Market.  It has the most scrumptious images and darling fonted sentiments!!  I chose to use the basket full of Cauliflower and create a scene with it using dies and Distress Inks.  Cauliflower can be purple, green, white, or ivory these days, so I colored mine with a variety of colors.  I colored the sign to look like a chalkboard (since that's been popular for quite some time now), and white embossed the sentiment "Just for you" onto it.  At the top I added a flag with the sentiment "Share what you love", and at the risk of being a little lot corny, added a little bunny to the opposite corner, as if the "just for you sign" and sentiment, were meant him.  *grin*


Here's a close up of the stamped image and sentiments.  Isn't that basket darling?

Now, if you haven't check out the other Bloom Brigade's Blogs, you better hop on over.  Those girls just ooze inspiration!!

Here's a list of the Copics I used:   T7, T5, T4, T2, T0, E59, E39, E37, E35, E31, E41, E40, BV08, BV04, BV02, BV00, G28, G24, G21, YG25, YG23, YG21

Thanks for dropping by.  Be sure to visit tomorrow too.  I can't wait for you to see that project.  I LOVE Fall, and tomorrow's project feels all cozy to me.

     Happy Stamping!

__________________________________________________________________________

Stamps:  Farmer's Market (Power Poppy)
Paper:  Cryogen White, Vintage Cream and Kraft (PTI)
Ink:  Versamark, Onyx Black (Versafine), Tuxedo Black (Memento), Barn Door, Black Soot, Crushed Olive, Forest Moss, Gathered Twigs, Mowed Lawn, Pumice Stone, Shabby Shutters, Tumbled Glass, Vintage Photo, and Walnut Stain (Ranger Distress)
Accessories:  Copics, Tall Tree and Rustic Sign and Trees dies (Cottage Cutz), Bench Wooden die (Marianne Creatables), Grass die-namics (MFT), Wood Dots (MME), Sewing Machine, Distrezz-it-All (Zutter), White Embossing Powder


Friday, July 18, 2014

Sending Sunshine


Wow!!  Do you feel like this Summer is flying by?  We're already half way through July!!  Crazy!
Well, since it's Friday, I have a Power Poppy inspiration to share with you.

I have a dear, dear friend who is going a round with cancer for the 3rd time and my heart is just breaking for her and her family.  They live 2000 miles away, so there is little I can do to help.  So, I thought I'd send her a "Box of Sunshine".  You may have seen this idea floating around Pinterest.  I have a variety of yellow gifts I'm going to send her, so of course I had to make a card with a yellow theme to send with them. 

Marcy's Peonies, from the Dynamic Duos: Peonies and Tulips set, are just so lovely and soothing to me.  So I decided I wanted them to be my focal point.   I stamped them with Versamark onto Water color paper, embossed them with White ep, and colored them with Distress Markers.  There are beautiful sentiments included in this set too.  I just couldn't fit them on the front of my card.

http://powerpoppy.blogspot.com/
The background dp is, appropriately called "On the Sunny Side".  I also added some Corrugated Tape and some Seam Binding that I tied using the Bow-it-All.

Now, for more details on how you can be the Power Poppy Peep of the week, click HERE, or on the graphic.

For some more Power Poppy inspiration, check out what these Bloom Brigade members have to share:

_______________________________________________________________________

Stamps:  Dynamic Duos: Peonies and Tulips (Power Poppy)
Paper:  On the Sunny Side (MME), Water Color, White (PTI)
Ink:  Versamark
Accessories:  Decorative Labels Twenty-Seven and Octagon dies (Spellbinders), Distress Markers, Seam Binding, Sparklers (Webster's Pages), Hat Pins (Petaloo and Prima), White Corrugate Tape (Little B), Lace, White Embossing Powder (Ranger) 

Friday, July 11, 2014

You're Special! Be Yourself!


Wow!  It's been awhile since I've posted here.  I'm sorry for the lack of consistency, but in my defense, it's been a busy summer, like most of you experience.  I had to fly to the Midwest for a wedding only to return and have my son and his fiance (they both live out of state) visit for a week.  And since she was in the area, we put on a Bridal Shower for her.  That meant creating gifts and decorating, along with sightseeing since she'd never been to the area before.  I'm exhausted, but we had the most fabulous time!


So, now on to my card for this week's Power Poppy Peep of the Week Challenge.  I chose to use one of the succulents from the Sassy Succulents set.  I love the encouraging sentiments Marcy has included.  My daughter is quite independent in her appearance and view on life, and I embrace it,  although others don't always accept her uniqueness.  She has bright red hair, and likes unique earring cuffs. (She only has one piercing in each ear.)  I think she's just beautiful, but others can be a bit harsh in their judgements.  Ironically, she is a Church Music Coordinator major in college.  And Christians can be some of the hardest judges.  But, one of the many beauties of God, is that he gives us free will, and that gives us liberty to express ourselves in our own way, and others are allowed to form their own opinions.  And that's okay.

I made this card for my daughter this week to celebrate her, and to let her know I love her just the way she is.  The sentiment says: "You're Special!  Be yourself!!  I LOVE that.  God made each of us unique.  And we may not understand how others do their make-up, dress, decorate their yards or houses, or even their own bodies.  And that's okay.  God loves us, and we need to love ourselves the way he created us!!


Okay, enough of my soap box.  ;)  I don't usually share personal stuff much on my blog.  I'm pretty shy that way.  But this card is special to me, and I wanted to explain a bit why this set is so near to my heart.

I colored the succulent and pot with Copics, cut it out, and adhered it to decorative paper.  I also included texture in my card.  I was inspired by yesterday's "Ways To Use It" Challenge (WT487) over at Splitcoaststampers.com  I embossed the background panel with the Bricks and Bark M-Bossibilities folder by Spellbinders.  I then sanded it and added some depth with Vintage Photo Ranger Distress Ink. I also added texture by using a Copper Pearl Pen on the Hinge, and the leaves are not glued down, so they flow a bit freely from the card.

That's it for me today.  Be sure to visit the other Bloom Brigade Blogs for some more inspiration!

Here are the Copics I used:  G28, G24, G21, E39, E37, E33, E31, T5, VO6, 0 (Colorless Blender)

Happy Stamping my friends!!
______________________________________________________________________

Stamps:  Sassy Succulents (Power Poppy)
Paper:  Memorabilia (Teresa Collins), Cryogen White, Kraft (PTI)
Ink:  Tuxedo Black (Memento), Vintage Photo (Ranger Distress), Smokey Gray and Black Onyx (Versafine)
Accessories:  Copics, Bricks and Bark M-Bossibilities (Spellbinders), Hinge dies (Cheery Lynn Designs), Copper Pearl Pen, Sanding Block 

Tuesday, July 1, 2014

Power Poppy July Release Hop!


Hello Power Poppy friends!!  Have you enjoyed seeing all the new images Marcy has designed?  Aren't they just exquisite?!?!?!

Well, I have one more project to share, and I have to say, it's my favorite.  I used Copics to color one of the Cosmos and a Poppy from the Countryside Bouquet image and diecut it using Spellbinders' Rectangle One Media Mixage Rectangles that is designed to go with it's coordinating Bezel.  I then coated it with Paper Sealer (Susan Lenart Kazmer), and adhered it inside my Bezel.  Lastly I added the Ice resin and some beads that I wire wrapped.  I'm really happy with how it turned out.  This was my first attempt at making a resin necklace using a Copic colored image.

That's it for my project today.  For more phenomenal inspiration, check out the rest of the Bloom Brigade Blogs:

Copics:  R39, R29, R24, R20, T7, T5, T1, B00, G46, YG13
_______________________________________________________________ 

Stamps:  Countryside Bouquet (Power Poppy)
Paper:  Cryogen White
Ink:  Tuxedo Black (Memento)
Accessories:  Copics, Rectangles One Media Mixage dies and Bezels (Spellbinders), Ice Resin, Beads and chain (Firemountain Gems), 20 gauge wire