Pages

Sunday, November 30, 2014

Vintage Postcards ~ Waltzingmouse Stamps Dec. Release


Hello my dear creative friends!!  I've been on pins and needles eager to share this project with you because it is so dear to my heart.  For the last 3 years, for 5 glorious days, the first weekend in November I got to spend time with two very special and talented friends ( Linda Duke and Becca Feeken ) in Pasadena, CA at the Spellbound Event.  It's a time when women from all over the country and Canada, come together to learn creative techniques by incredibly talented women who have mastered their craft.  We made rhinestone and leather wrapped bracelets, a Mica dusted snowman (which appears in the final photo), Soldered bracelet charms, and a beautiful wall hanging which was my inspiration for today's project. 

I LOVE anything vintage!  I know...shocker!!  So when Claire came out with a Vintage Postcard set, I was beside myself with giddiness!!  Seriously...I'm sure I looked quite silly.  Since I had just made a lace and applique adorned wall hanging, I knew, right away, that I wanted to make a framed collage to compliment it.  This is what I came up with.


I started by stamping the top "Post Card" image with Smokey Gray Versafine ink, and added the the lined image along with some "distressed" text from the Text-It set.  To get it to look distressed, I just inked up the text, and took my finger and rubbed some off.  Easy-peasy!  Lastly I added the stamp in the corner by inking it up with Perfect Plumeria (VersaMagic) in the center, and Malted Mauve (VersaMagic) along the border.  After distressing the Post card with Antique Linen (Ranger Distress Ink, along with a bit of Vintage Photo and Black Soot (Ranger Distress), I layered it over a collage of diecut pieces, and included a few more.  All the supplies will be included at the bottom of this post. (There's quite a list.... ;)


After creating my collage, I wanted to mount it in a shadow box, so I purchased a black frame from Amazon Prime and had the frame delivered in two days.  SWEET!  But it was black.  That totally didn't fit with my vintage theme.  So, I took Champagne Gold Metallic DecoArt Acrylic paint and used a sponge dauber to add ink and texture to the frame.  The base in the shadowbox is just decorative lace paper that I purchased at Paper Source in Pasadena, CA last year while at the Spellbound Event.  You never know when a last minute purchase will come in handy.  It could even take a year.  :)


Here it is framed and hanging on the wall.  It's hard to get a good photo with the glass, and I have a huge and I mean HUGE window in the front of my home where this is hanging.


Lastly, here's a look at the grouping.  I made the snowman (taught by Colleen Moody) while at Spellbound, and the garland laying on the suspended table was made by A Gilded Life (the mother-daughter team who puts on Spellbound).  The Bottle brush trees, as well as the Tree of Pearls were purchased at Roger's Gardens in Corona Del Mar, CA while we were down South for Spellbound.  That store is INCREDIBLE!!  To say the least!!

Whew!  That's finally it for today.  I know...quite a long post.  But like I said at the beginning, it's a project dear to my heart because it will always remind me of the special time spent in Pasadena with Linda and Becca!  

Thank you so much for dropping by!!  I hope you are having an awesome weekend, and will stop in again tomorrow for another vintage inspired creation!

Happy Stamping!
___________________________________________________________________

StampsVintage Postcard and Text-It (Waltzingmouse)
Paper:  Fabrications (Teresa Collins), Lace (Paper Source), Kraft, Vintage Cream and Smokey Shadow (PTI)
Ink:  Perfect Plumeria and Malted Mauve (VersaMagic), Smokey Gray (Versafine), Antique Linen, Vintage Photo and Black Soot (Ranger Distress), Versmark
Accessories:  Dies-Vintage Bicycle die 262 (Marianne Designs), Carnation Creations, Opulent Ovals, Bow Elegance (Spellbinders), Birds and Blooms Bird and Hearts Primitive (Sizzix), Burlap Trim (Paper Mart), Shabby White and Aged Aqua Embossing Enamel (Stampendous), Felt (Prairie Point Junction), Seam Binding Ribbon (Prairie Bird Boutique - Etsy), Chunky Glitter (American Crafts), Paper Rose (Prima), Lace Trim (A Gilded Life), Silver Leaves (Wild Orchid Crafts), Mica Flakes, Rhinestone (Queen & Company)

Camellias ~ Power Poppy December Digi Release

For my Waltzingmouse post, click HERE. 


Camellias are such a elegant flower.  They're full of layers that are a delight to color. And I'm so excited to share the new Camellias Digi release by Power Poppy today.  That's just one of the nice things about Digis...you can get them right away!  Another is you can make the image as large or small as you like.  I printed mine at 2 1/2" x 4", and colored it with Copics.

Now you'll want to take a peak at what these Bloom Brigade members have to share, because they are nothing short of pure gorgeousness!!


Copics:  YR82, YR68, YR61, YR20, YR02, YG97, YG95, YG93, YG03, E57

That sums up today's project.  I hope you'll drop by tomorrow for 2 more inspirational projects!

  Happy Stamping!

_____________________________________________________________

StampsCamellias (Power Poppy)
Paper:  Engraver (Prima), Black and Kraft (PTI), X-Press It Blending
Ink:  Antique Linen (Ranger Distress)
Accessories:  Copics, Elegant Ovals, 5X7 Heirloom Legacy and A2 Bracket Borders One dies (Spellbinders), Burlap Trims (Prima), Button (PTI), Dragonfly (littlescrapshop-etsy), Sequins (Pretty Pink Posh and A Gilded Life), Burlap String (May Arts) 

Saturday, November 29, 2014

Waltzingmouse Dec. Release ~ Old Country Roses

For my Power Poppy Post, click HERE


I'm sharing two posts each day for the next few days, so if you missed my previous post, click on the link at the top of the post.  Right now, however, I'm super excited to share one of the new Waltzingmouse Stamps releases called Old Country Roses.  It's a layered image set full of gorgeous Roses, leaves, and this sweet sentiment.

I decided to go for a watercolor effect using a variety of Ranger Distress Inks with Watercolor paper.  I layered my rose by "stamping off" the image, onto some scrap cardstock, after inking it with Dusty Concord.  I then stamped the next layer using Dusty Concord without first "stamping it off".  Lastly, I added the final layer (the flower center) using Chipped Sapphire.  For the leaves, I inked up the leaf base with Bundled Sage, the second layer with Crushed Olive, and the final layer with Forest Moss.  After creating my background, I spritzed the paper with water allowing the inks to run.  While it was still wet, I laid another piece of watercolor paper on the top to soak up the excess ink, thus creating my background for the sentiment.  I LOVE the splotches.

That about sums up this project for today.
Thanks for dropping by!
    Happy Stamping!

___________________________________________________________________

StampsOld Country Roses (Waltzingmouse Stamps)
Paper:  Watercolor, White (PTI)
Ink:  Dusty Concord, Chipped Sapphire, Bundled Sage, Crushed Olive, Forest Moss (Ranger Distress), Black Onyx (Versafine)
Accessories:  Regal Frame and A2 Matting Basics A dies (Spellbinders), Silk Ribbon (Stamp Simply Ribbon Store), Sparklet (Kaisercraft)  

Winter Pick-Me-Up ~ Power Poppy

For my Waltzingmouse Post, click HERE


Hello stamping friends!!  I've been MIA for quite some time now, and I apologize.  November has been an interesting month to say the least, but I'm excited to share some new Power Poppy Digi releases with you over the next couple of days.  This first one is called Winter Pick-Me-Up, appropriately so.  The bouquet is filled with lovely delicate blooms along with Pussy Willow branches.  Super charming. 

I printed mine onto X-Press It Blending cardstock using a gray scale.  Using Word and Adobe Photoshop Elements, I sized my image angled it, and added the sentiment.  You can find tutorials on how to do this on the Power Poppy Blog HERE.

That's it for me.
Now, be sure to check out what these talented Bloom Brigade designers have to share for inspiration.

Copics Crocus: BV02, BV00, BV000, BV0000, YR04, YR02, Y08 Leaves:  YG09, YG06, YG00, Pussy Willows:  W2, W1, W00, E35, E31, T2 Snow Drops:  C1, C0, Y08, Y02 Ribbon:  R37, R35, R32 Sky:  B00, B000, B0000


Thanks for stopping by!
Happy Stamping!


______________________________________________________________________

StampsWinter Pick-me-up (Power Poppy)
Paper:  X-Press It Blending, White (PTI), Enchanted Garden (Bo Bunny)
Accessories:  Copics, A2 Matting Basics die (Spellbinders), Sequins (Pretty Pink Posh), Sparklet (Kaisercraft), Embroidery Thread, Printer

Wednesday, November 26, 2014

Power Poppy Black Friday Sale


20% Off for 24 Hours with Power Poppy's first ever sale! 

~ This Sale will run from midnight on the 28th through 11:59 PM that evening. 
~ This Sale is on clear stamps only and doesn't apply to gift card purchases or digi stamps. 

Did you hear me say gift cards? YES! Power Poppy now has them, just in time for the holidays. So,   if you want to share that fact too -- here's a link:  Gift Cards


Friday, November 14, 2014

Waltzingmouse Pajama Party

For my Power Poppy post, click HERE.

It's the 14th, and that means it's time for another Pajama Party over at Waltzingmouse Stamps.  For all the party details, or to enter your project, click HERE.

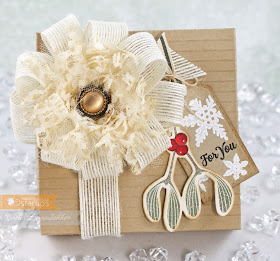
I made two projects today.  The first is for the "Wrap it up warm" challenge.  I made a box out of Kraft cardstock, scored at 1/4' intervals, and ink distressed it with Vintage Photo Distress Ink (Ranger).  I made a bow out of burlap ribbon, and some fancy trim, and added a stamped tag, because a gift is not complete without a tag right?  I used three WMS sets on this tag:  Festive Foliage, Warm Fuzzies, and Elf Made.  The tag was made with a WMS die called Stitched Tags.  My flakes are a little goopy, but I liked them that way.  They stamp clear and beautiful if you use Versamark ink and embossing powder.  I used a thick white, wet pigment ink, and was stamping them while the paper was still in the die.  That made the lines less defined because of the pressure required to stamp over the die. 


The "Helicopter pods" (that's what we called them as kids.  I have no idea what their technical name is.) were "Rock-n-Rolled with Olive Grove and Rich Cocoa Memento Inks.  The berries were colored with Copics.


My next project is for the "Old Pajamas" challenge to use Candy Jar Christmas sets.  I tell ya, Mrs. Claus can be a difficult lady.  I couldn't get the framing right.  Ovals, embossing powders, white on black, or black on white.  We finally both agreed this was good.  I thought she looked very authoritative in this silhouette, so the Candy Jar sentiment "Been Good?" seemed appropriate.  :)

That's it for today's projects.  I hope you have entered some projects for the challenges.  The more you enter, the better chance you have of winning some Waltzingmouse Store credit! 

Thanks for visiting!!

  Happy Stamping!

___________________________________________________________

Gift Box
StampsFestive Foliage, Warm Fuzzies, Elf Made (Waltzingmouse)
Paper:  Kraft and Vintage Cream (PTI)
Ink:  Olive Grove and Rich Cocoa (Memento), Whisper White (SU!), Vintage Photo Distress (Ranger)
Accessories:  Stitched Tags die (Waltzingmouse), Copics, Scor-Pal, White Embossing Powder (Ranger), Burlap Ribbon, Vintage Lace Trim, Vintage Button, Burlap String, Green Stripe Grossgrain Ribbon

Mrs. Claus Silhouette Card
StampsCandy Jar Christmas (Waltzingmouse)
Paper:  Santa's List (Teresa Collins), Black and White (PTI)
Ink:  Onyx Black (Versafine)
Accessories:  Labels 41 Decorative Accents dies (Spellbinders), Pearls (MME), Sewing Machine

Bottlebrush Resist


Hello my creative friends!!  I have a wonderfully CAS (Clean and Simple) card to share with you today for this weeks Power Poppy Peeps Challenge.  I used the Bottlebrush set for this card and it came together very quickly.

I just used a simple Emboss Resist Technique for this beautiful collage of Bottlebrush Trees.  I stamped them with Whisper White Pigment Ink (SU!), and embossed them with Super Fine White Embossing Powder (Ranger).  I then took a sponge dauber and, in a circular motion, added some Spun Sugar Ranger Distress Ink to the trees.  Lastly, I added a sentiment, using Smokey Gray Versafine ink, a Metallic embroidery thread bow, along with a Sparklet (Kaisercraft) center.  Easy, peasy.  Each panel is raised with Scotch Dimensional tape, and the border was punched using an EK Success punch with a double scored line above.

I did something a little different though with the framing of the trees though.  Let me explain:

To create the frame, I took a Standard Spellbinders Rectangle and laid it on top of white card stock.  I taped it down, flipped it over and laid it on the cutting plate with the rectangle side down.  I then put my embossing mat over it, along with another plate and ran it through my diecutting machine.  When you remove the rectangle die, you have a beautifully embossed piece.  But I flipped mine over and used the other side.  I loved how the frame popped up off the piece instead of appearing debossed.  Does that make sense?  

This first photo is the framed side I used.


Here's the flip side


I tried taking a picture of each one, but, it's hard to tell the difference in the photos.  All I can do is suggest that you try it yourself.  After embossing your shape, flip the card stock over and look at the other side.

This card is a standard A2 size, so it's easy to mail too.  You could eliminate the layers for a flatter version if you like.

Now, if you'd like some more inspiration, stop by the following Bloom Brigade Blogs:
Thanks for stopping by!!  I hope you have a terrific weekend!

       Happy Stamping!

____________________________________________________________

StampsBottlebrush (Power Poppy)
Paper:  White (PTI)
Ink:  Whisper White (SU!), Smokey Gray (Versafine), Spun Sugar (Ranger Distress)
Accessories:  White Embossing Powder (Ranger), Standard Rectangle Die (Spellbinders), Metallic Embroidery Thread, Sparklet (Kaisercraft), Dimensional Tape 

Tuesday, November 4, 2014

Funky Fall Feathers


I'm sharing a project over on the Waltzingmouse Team Talk Blog and would love it if you'd stop by for a visit!

     Happy Stamping!

Saturday, November 1, 2014

Power Poppy November Release ~ Oh Holy Night


 http://powerpoppy.com/collections/happiest-holiday-collection


Power Poppy's November release is now available for purchase!!!  Woo-Hoo!!  It's actually the second of two Holiday Releases.  You can find them both HERE.  I used the new Oh Holy Night set for today's card.  I just embossed it with Silver Embossing Powder onto Vellum, adhered it to some silver cardstock, and added an embellished bow.  The frame was embossed with Shabby White Embossing Enamel.


That's it for me.  Be sure to check out what the rest of the Bloom Brigade has to share for inspiration!!
Be sure to stop by Power Poppy for this month's release.

    Happy Stamping!
_____________________________________________________________

StampsOh Holy Night (Power Poppy)
Paper:  Vintage Cream and Vellum (PTI), Silver
Ink:  Versamark
Accessories:  A2 Devine Eloquence die (Spellbinders), Silver Embossing Powder (Sweet Stamps), Shabby White Embossing Enamel (Stampendous), Ribbon (Stamp Simply Ribbon Store), Decorative Stick Pins (Crafting with Darcie and Pizzazz Aplenty), Border Punch (Martha Stewart), Cream Pearl Pen (Viva Decor)