Thursday, September 29, 2011

Perk Up...

It's been awhile since I posted. Do you ever get burnt out from stamping? I do sometimes, especially after a huge DT release. Ideas run through my head, but sometimes the thought of putting them to paper can be a bit overwhelming. It usually takes another commitment to get me in the groove, and the CCEE Stampers Challenge did just that.

We were to include anything postage on our projects. Well, I used the new Postage Stamps dies from Spellbinders (you can find them at Stampers Dream)along the bottom of my card. For the images, I used Verve's Better with You set. LOVE the mug, and all the little extras included in this sweet coffee/tea set. See the swirls down by the hearts? Those were stamped with one of the steam images in the set. I used both "steams" above the mug too, with Latte and French Roast inks by a muse.

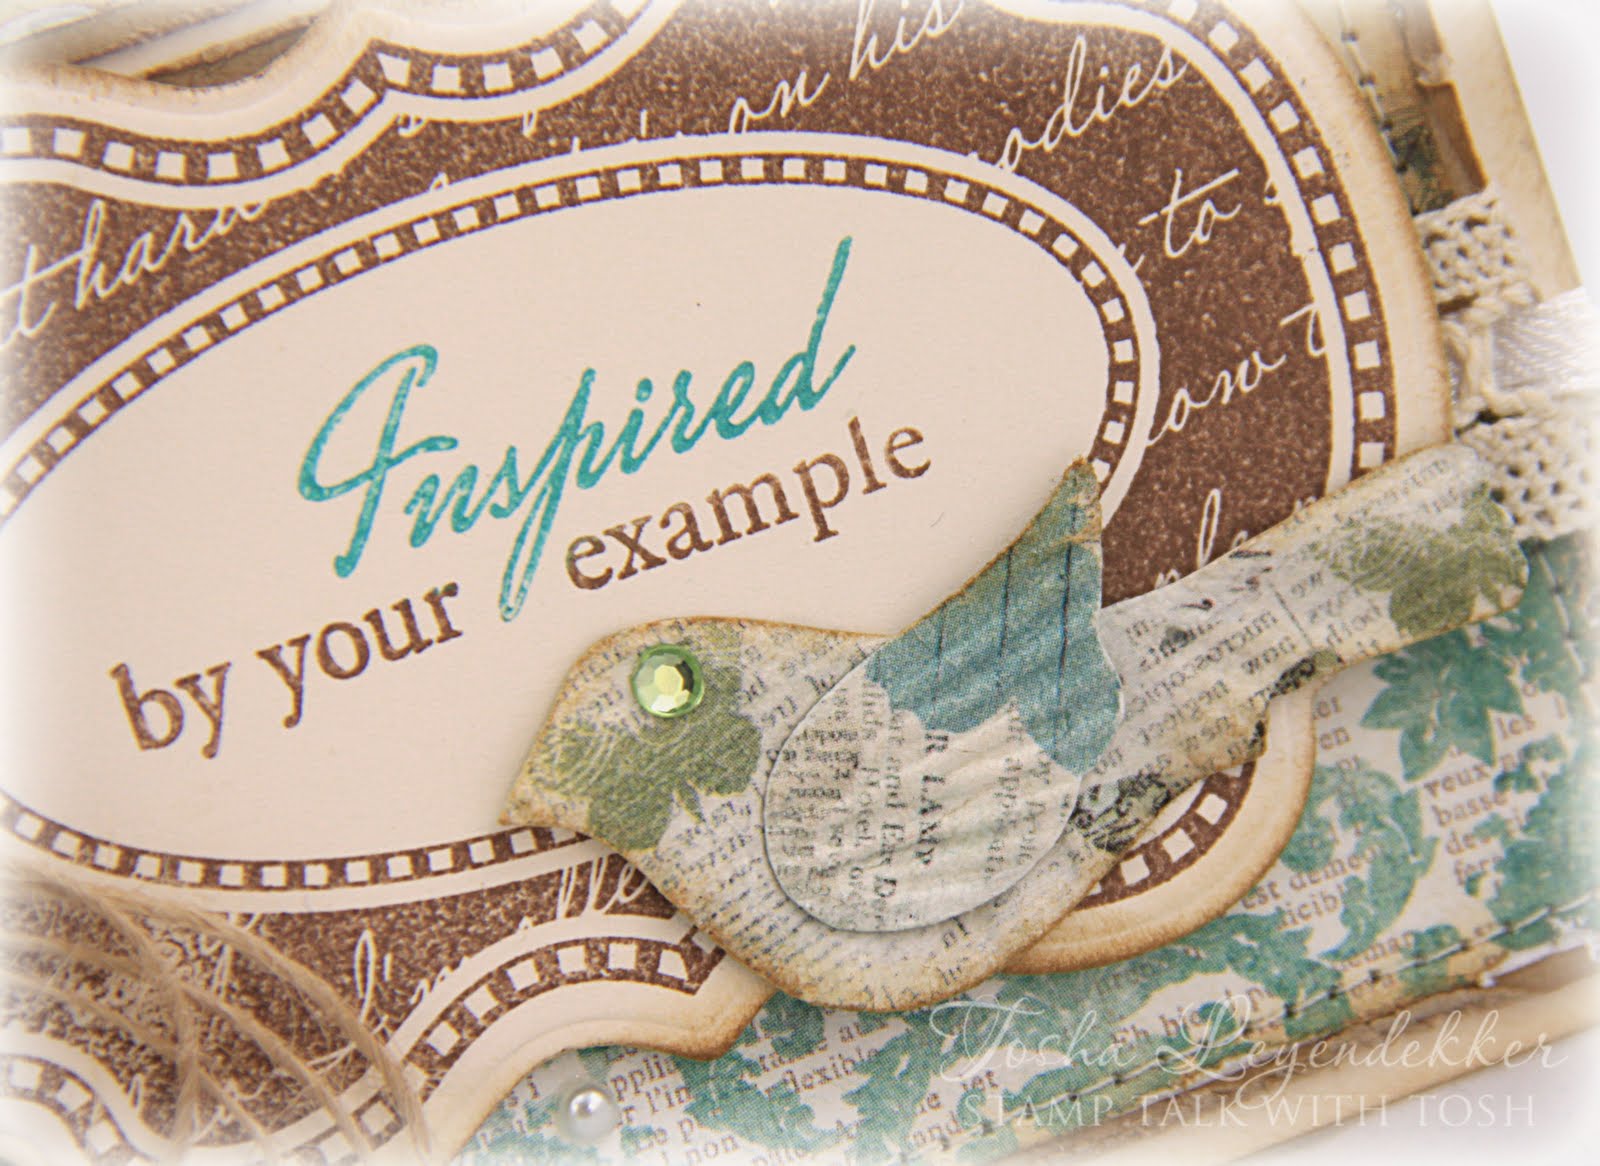
The paper is all from one of my favorite companies, My Mind's Eye. It's from their Rosy Lost & Found Collection. You can find this paper at Stampers Dream also, as well as the Picot Edge Circle die (Spellbinders), that I framed the mug with.

That's it for today. Thank you so very much for stopping by. Be sure to check out the CCEE Stampers Blog to see how the girls interpreted this week's postage theme!!

Happy Stamping!

post signature

____________________________________________________

Stamps: Better with You (Verve)
Paper: Vintage Cream (PTI), Rosy (Lost & Found MME)
Ink: Vintage Sepia (Versafine), Brushed Corduroy (Ranger Distress), French Roast and Latte (a muse) and Bronze Queue (ColorBox)
Accessories: Postage Stamp, Picot Edge Circle and Standard Circle dies (Spellbinders), Ribbon (Martha Stewart), Brad (Basicgrey), Button (PTI), Lace (Kaisercraft), Sewing Machine

Thursday, September 22, 2011

Gift Bag Topper Tutorial


I've been getting quite a few requests for a tutorial on how to make the Gift Bag Topper I posted a couple of days ago. You can find that bag HERE.

It's really quite easy. I made the topper a bit different this time. But don't worry, I'll include measurements for both toppers.

Supplies for Punched topper:

8" x 4 1/4" x 10 1/2" Gift Bag
9" x 12" cardstock
(2) 1 1/8" x 7 3/4" and (2) 1 1/8" x 4 3/4" decorative paper for sides
4 3/4" x 7 3/4" decorative paper for the top of the topper
Scor-Pal
Ruler
Exacto knife


For this one, I started with a 9" x 12" base, and scored 2" in on all four sides. I then took a punch (In this case it was an EK Success one), and started in the middle of each side and worked my way out. That way each punched side is evenly balanced. You don't have to go all the way to the end because you're going to trim the excess off in a bit. Make sure you pass the score marks though.


Trim off the extra punched piece so your tab can fold in without being seen through the punched areas. Then, on the short ends, cut in to the scored line.


Now you need a slit for the handles to go through. I used a ruler and an exacto knife after drawing a line to cut. Begin your cut 1 5/8" in from each side and 1/8" from the side. It has to be wide enough to slide the handle through. Then glue the tabs behind the short ends, and decorate as you wish.


That's it. Like I said it's really very easy.

For my bag, I used one of the newest Waltzingmouse released sets called Say it Loud/Winter Holiday.

Now, I made this bag for the CCEE Stampers Challenge which is to make a "card" with a bird on it. I rebelled a bit and made a bag instead of a card....shhhhhhh.... :) See my little bird hanging from the flower? Be sure to stop by the CCEE Stampers blog for some fabulous bird watching.

Before I go, I promised the template measurements for a topper without a punched border. Here they are:

Supplies for Plain Topper

8" x 11" Cardstock
(2) 1 1/4" x 4 3/4" and (2) 1 1/4" x 7 3/4" decorative paper for sides
Score 1 1/2" around each side and Begin slit cut 1 1/2" from the long sides.

Thank you so much for stopping by. I hope you're having a wonderful week.
Happy Stamping!!

post signature

____________________________________________________

Stamps: Say it Loud/Winter Holiday (Waltzingmouse)
Paper: PTI and Love Nest (Glitz)
Ink: Onyx Black (Versafine) Colorbox Queue, Antique Linen, Vintage Photo and Black Soot (Ranger Distress)
Accessories: Border Punches (EK Success and Martha Stewart), Flower (Prima), Bird Cage embellishment (The Girls' Paperie), Scor-pal

Wednesday, September 21, 2011

A Diva Dare Case

A Diva Dare's been thrown out by Laurie this month. The dare is to CASE a Diva, and I have the honor of CASEing Jackie. What fun to be "Jackie" for awhile. Channeling her diva skills, using her sketch...and ideas....*grin*. Pure stamping fun!!

Now comes the really hard part. Choosing one of Jackie's stunning cards. No easy task, let me tell you. I finally settled on THIS ONE, because I liked the layout and shapes she used. I don't normally think vertical like this sketch suggests, so it was fun to work with. She also has a fabulous way of working with colors and patterns. I loved the horizontal striped panel in the back.


So, for my CASE, I used the same set, Sunny Days, for the flowers and leaves, and added a sentiment from the set Making a Statement. I changed my shapes up a bit, and added some Webster's Pages flocked netting behind the main panel. I also changed my color palette.

That's it for my card. Let me remind you how these dares work. If you make a card and link it to the first diva dare post HERE, you have a chance to win a $30 Verve gift certificate. By leaving comments in you have an opportunity to win a Verve set of your choice. Now doesn't that sound fun? So, head on over to the Verve Stamps blog for all the details.

post signature

____________________________________________________

Stamps: Sunny Days and Making a Statement (Verve) Paper: PTI, Breeze (Lost & Found MME) Ink: Rich Cocoa (Memento), Brushed Corduroy (Ranger Distress) Accessories: Leafy Sprigs die (Verve), Labels 1 and Fancy Tags 3 dies (Spellbinders), Cream Viva Decor Gel Pens, Netting (Webster's Pages), Sewing Machine

Tuesday, September 20, 2011

Wishing You the happiest of days!

I made this card for a special young lady today who's being featured on the Teapot Tuesday thread found HERE. Breanne swam with my son for 3 years on their High School swim team. They both were butterfliers. Unfortunately Breanne began getting ill while in High School and had a hard time swimming. Sadly she was diagnosed with Relapsing MS, and will be fighting this disease for the rest of her life. For more about Breanne, click HERE.

Well, music is a favorite of hers, so Cindy challenged everyone to include music or black/white stripes on their cards.

I used this week's Mojo Monday 207, with Verve sets Wishing You and Wonderful Wishes Remix.

Short post today my friends. Long day, and I'm tuckered.
I hope you're having a good week.
Happy Stamping!!

post signature
__________________________________________________

Stamps: Wishing You, and Wonderful Wishes (Verve)
Paper: Sunshine (Lost and Found MME), PTI
Ink: Onyx Black (Versafine), Black Soot (Ranger Distress Ink)
Accessories: Fleur De Lis Rectangles and Standard Oval dies (Spellbinders), Ribbon, Butterfly Punch (EK Success), Rhinestones (Kaisercraft), Sewing Machine

Monday, September 19, 2011

Waltzingmouse Sept. Release Blog Waltz ~ A Christmas Cottage

It's day four of the Waltzingmouse Sneak peeks, and we're having a blog waltz featuring the new set A Cottage Christmas. It includes the sweetest little Christmas cottage, along with a darling snowman, some charming trees, brilliant snowflakes, and gorgeous sentiments! What a delight it is to work with this set. If you arrived here from Anya's blog, you're on the right track. If not, you'll want to start at the beginning with Claire. She's leading our Waltz today. :) The four sets we've been peeking are now available too. So after the hop, head on over to Waltzingmouse Stamps to see the complete sets!!

Okay, now for my project...

My goodness, it's been like a gazillion years since I've made a gift bag topper. Okay, so I may have exaggerated a bit, but it's been at least 6 or more. I used to see them all the time. So, since lace and punches are so in right now, I thought it would be fun to make one again, with lace trim, using an Alesa Baker template that I have had forever! The images I used that are from this set are: The cottage (of course), the tree trio, the Snowman on the tag, the sentiment in the top left which reads: "From our House to Yours", and the flakes behind the cottage, and on the top of the topper. I combined these images with some images from the set Very Vintage Christmas: the topper border, and the "to" and "from" sentiments.

I used a Viva Decor Ice White Gel pen with some white opaque ultrafine glitter for the snow.


I stamped the decorative border along the topper, with Versamark, embossed it with black ep, and colored it with Tombows. Incidentally, all the images are colored with Tombows.


Isn't that BoBunny Santa Brad cute? I thought it was a fun addition to the bow.


Here's a close up of the top so you can see the snowflakes.


Before I go, I want to let you know that you have a chance to win a Waltzingmouse Stamp Set of your choice. All you have to do is leave a comment on as many of the blogs, along the Blog Waltz, that you can, by Sept. 22. A Winner will be chosen from one of the design team member's blogs and will be announced on Sept. 23 on Claire's blog.

That's it from me today. Next along the hop is the fabulously talented Becca.
Thanks for visiting!!
Happy Stamping!
post signature
______________________________________________________

Stamps: A Cottage Christmas, Very Vintage Christmas Paper: Black and Kraft (PTI), Watercolor, and Christmas (Lost & Found MME) Ink: Versamark, Onyx Black (Versafine), Latte (a muse), Vintage Photo (Ranger Distress) Accessories: Tombow Markers, Labels 15, Standard Circle, and Picot Edge Circle dies (Spellbinders), lace (Vintage), Ice White Gel Pen (Viva Decor), Ultrafine Opaque White Glitter, Black Burlap String, Santa Brad (Bo Bunny Noel Icandy), Seam Binding Ribbon (MemrieMare), Border Punch (Martha Stewart), Dimensional Tape (Scotch), Gift Bag Topper Template (Alesa Baker)

Sunday, September 18, 2011

Waltzingmouse Sept. Release ~ Hocus Pocus


Have you been enjoying the Waltzingmouse Sept. release peeks? I know I've had a ton of fun working with these new images, and it's obvious the rest of the team has too by their exquisite projects.

Well, I'm excited to share with you what I made with the new Hocus Pocus set. It has the most fun silhouette images (two of which I used on yesterday's project), and some fabulously spooky fonted sentiments!! And then there's the creepy gated fence....LOVE it!!

Now, I was thinking...Halloween doesn't have to be just about the kids does it? I mean, have you outgrown your craving for sugary treats? I thought not. So, I thought it would be fun to create a little treat gift box filled with a chocolate goody an adult would love. Have you ever had Ferrero Rocher and Rondnoir Chocolates? YUM!! Anyway, that's what I filled this sweet little box with.

Oh, I should tell you how I made the box. Easy as pie!! I used the Spellbinders Square Petal Top Box die. When you emboss it, all the score lines are made for you. I just used a bone folder to make nice crisp folds, and glued it together. I then stamped the fence onto some Fine Linen PTI cardstock, and cut it into panels that fit along the box edges. I used the wonderful circular bat/moon image for my medallion topper and added some Webster's Pages Netting behind the button and Black Burlap string. I think it looks a bit like a web. Don't you?


Lastly, I filled it with the Candy. Four pieces fit perfectly inside. Oh, I almost forgot, I embossed the "Halloween Wishes" sentiment, with detail black ep, onto one of the side panels too.


That's it for my project. I hope you've visited all the other blogs today too. You won't want to miss a one, that's for sure.
Thanks so much for all your kind and encouraging comments. It's so generous of you to share your kind thoughts. They are much appreciated.

Thanks for visiting!!
Happy Stamping!

post signature

_____________________________________________________

Stamps: Hocus Pocus
Paper: Black and Fine Linen (PTI)
Ink: Onyx Black (Versafine), Versamark, Black Soot (Ranger Distress)
Accessories: Square Petal Top Box, Petite Scallop Circle and Standard Circle dies (Spellbinders), Netting (Webster's Pages), Black Burlap String (May Arts), Button (PTI), Ferrero Rocher and Ferrero Rondnoir candy

Saturday, September 17, 2011

Waltzingmouse Sept. Release ~ Say it Loud/Autumn Winter


Welcome to day two of this month's Waltingmouse release. First of all, I'm sure you noticed some new DT members yesterday. What a fabulous addition don't you think? I'm thrilled to be designing with Kelly Schirmer, Clare Buswell, and Becca Feeken. They're all uber talented and just as sweet!

Now for today's release. The team is featuring the set Say it Loud/Autumn Winter. If you loved the last Say it Loud release, you're gonna love this one just as much, let me tell you. Fabulous bold sentiments with charming little additions all in caps. I combined the large "Halloween" sentiment with two littler ones, "bring on the" and "treats". LOVE all the possibilities of this set. I also need to mention I used the WMS sketch challenge #65 for today's peek. I love's Anya's sketches. They always leave room for interpretation.

I made this a Halloween card because I'm participating in this month's WMS Blog Waltz and the theme is Halloween. So, I have to confess that I peeked a set a little early. See the witch and the crow silhouette? shhhhhhh.......they're from a set being peeked tomorrow. But I just had to use them for the Waltz. I'm justified....right? *grin*

My witch is framed with an oval from the Ovals-Classic Frames set that was released in August. It's heavily distressed, so the frame is hard to see. The oval background frame was stamped with Lemon whip ink (a muse), and the silhouette was stamped with Onyx Black Versafine ink. The dp is from the Printery Collection by Prima.

Here's a list of the dt members participating today, in case you've missed some along the way.


That about sums up my card for today. I hope you're enjoying the Waltzingmouse Peeks!
Happy Stamping!

post signature

____________________________________________________

Stamps: Say it Loud/Autumn Winter, Ovals-Classic Frames (Waltzingmouse) Paper: PTI, Printery (Prima) Ink: Onyx Black (Versafine), Lemon Whip (a muse), Black Soot (Ranger Distress) Accessories: Beaded Oval and Grand Labels 11 dies (Spellbinders), Lace (Kaisercraft), Library Clip (SU!), Seam Binding Ribbon (MemrieMare), Black Burlap String, piercing tool

Friday, September 16, 2011

Viva la Verve September Week 3 ~ Miss You


I have the distinct privilege of hosting the Viva la Verve Sketch in the Splitcoast Stampers Verve Forum this week!! Click Here for all the details on how you can participate and win some Verve for yourself!!

I knew I wanted to use the set You and I because the letters are just too fun! Especially when paired with the new I Heart U dies. I started off by stamping the letter "U" with Vintage Cream PTI ink onto some corrugated paper, then diecut it with the "U" die from the I Heart U die set. I love how it turned out. I stamped the sentiment "miss", from the You and I set, onto a little banner flag and attached it with some sewing. I also added the heart behind the "U" with the Verve Jotted heart die, and the flower was made with the Spellbinders Rose Creations die.

Can you see the circle border in the background? That was made with one of Spellbinders' new dies called Teardrop Circles.

That about sums up my Verve card for today. I'm also sneak peeking for Waltzingmouse, so head to the top of this post for a link to that post.

Thanks so much for stopping by. I hope you have a super fantastic weekend!!
Happy Stamping!

post signature

____________________________________________________

Stamps: You and I (Verve)
Paper: Portobello Road (Lost & Found MME), Vintage Cream and Spring Rain (PTI), Corrugated
Ink: French Roast (a muse), Vintage Cream (PTI), Brushed Corduroy (Ranger Distress)
Accessories: I Heart U and Jotted heart die (Verve), Teardrop Circles Standard Circle and Rose Creations dies (Spellbinders), Lace (Wild Orchid Crafts), Leaf die (Sizzix), Natural Burlap String (May Arts), Button (PTI), Sewing Machine, Distrezz-it-All (Zutter)

Waltzingmouse Sept. Release ~ A Cottage Home


Claire (Waltzingmouse) has designed the sweetest little cottages for this release! The set we're peeking today is called A Cottage Home. The details are amazing and so intricate, and she's included some wonderful ornate images and beautifully fonted sentiments.

I decided to be "krafty" with my cottage today and embossed it in white. Claire thoughtfully included the front portion of the house as an individual image too, so it's easy to use for dimension.

To complete my CAS card, I just added some Teeny Trees images to the Background with the "Welcome" sentiment that is from this new A Cottage Home set.

Here's the hop list in case you missed any along the way.

Thanks so much for stopping by. Be sure to visit tomorrow. I have two more cards to share with you!
Happy Stamping!!

post signature

_____________________________________________________

Stamps: A Cottage Home and Teeny Trees
Paper: PTI
Ink: Versamark, Lichen, Sky and Lemon Whip (a muse)
Accessories: White Embossing Powder

Thursday, September 15, 2011

Thanks a latte...


Hello everyone! I have a CCEE Stamper's Blog challenge card to share with you today. Cindy is challenging you stampers to make a pink card with lace on it. I think I followed the rules to a "T" today. *grin* The sweet mug and sentiment are from the new Verve set Better with You. They were stamped with French Roast amuse studio ink. All the dp is from the beautiful Lost and Found MME paper line Blush. I rarely make pink cards, but I so love this paper!! Of course, there's very little My Mind's Eye paper that I don't love. :) The little heart was made using the Verve die set From the Heart.

I used some new "toys" for behind the mug. I love my Spellbinder's dies!! This time I used the Ornate Artisan Tags and Accents that I got from Stamper's Dream. You might want to check out her store. She has a fabulous variety of Spellbinder's Dies.

This card also fits for the Get Your Diva On challenge found HERE. If you'd like to be a guest diva for Verve, this is a challenge for you. All you have to do is make a monochromatic card. Head on over to the Verve forum HERE for all the details.

That's it from me today. Be sure to stop by the next four days. Waltzingmouse is releasing some fabulous new sets the 19th and we're going to start sneak peeking them the 16th. I'm also hosting the Viva la Verve sketch in the Splitcoast Stamper's Verve Forum this week, so I'll have that to share with you tomorrow. There's a lot of stamping fun going on right now!! :)

Thanks for dropping by!
Happy Stamping!!

post signature

___________________________________________________

Stamps:
Better with You
Paper: Vintage Cream and Kraft (PTI), Blush (Lost and Found MME)
Ink: French Roast and Blush (a muse), Brushed Corduroy (Ranger Distress)
Accessories: From the Heart die (Verve), Ornate Artisan Tags and Accents die (Spellbinders), Lace (Lost and Found MME), Pink Burlap String (May Arts), Button (PTI), Rhinestone (Zva Creative), Sewing Machine

Wednesday, September 14, 2011

Easy Canvas Prints

A short while ago, I was asked by Easy Canvas Prints if I would like to have a photo of mine made into a canvas print and then write a review of the finished product. After visiting their website I decided I that it sounded like a fun idea. And boy was I right. Their site is so easy to navigate. The only hard part was deciding what photo I wanted to use. I love nature, especially flowers. So I decided to use a photo that I took of a dandelion a while back. Although I was concerned that the light and airy look of the dandelion would not work on the canvas. Well, it worked beautifully!!! I seriously love how it turned out. Here's a photo of my dandelion Picture on Canvas.


I chose to make my Canvas 8"x8". But they offer other sizes as well. You can even customize your own. They also offer different border options as well as different image and color effects. I chose to have my photo wrap around the frame. I like how the picture continues on through the edges.

Here is the canvas up against an old crate that I have in my dining room window. I'm going to eventually hang it up, but I'm shopping for some vintage items, and hope to make a couple more canvas prints to hang with this one. Like I mentioned before, the hard part is choosing a photo to use.


Thank you, Easy Canvas Prints, for letting me try out your product. I love the look and would most definitely recommend putting pictures on canvas using Easy Canvas Prints. I also have to add that I appreciate the quick shipping and the fabulous packing.

Thanks for visiting!!

post signature

Tuesday, September 13, 2011

Thinkin' about ya...

I have a quick post to share with ya'll today. I made this card for the Teapot Tuesday Challenge over on SCS using the Waltzingmouse Sketch #64 designed by Anya. For the Teapot challenge we were to include flourishes. Well, Waltzingmouse has the most gorgeous flourishes imho, so I set to work to make them the focal point. Our Teapot Destination is fellow SCSer, Michelle, who's had a lot of tough events thrown at her lately. Hope this makes ya smile Michelle!! :)

I started off by embossing flourishes, from the WMS set Flourishes-Scallops and Dots, with black ep, and adding a few I-Rock Rhinestones. I then added a little sentiment flag using the WMS set Frame It, and a banner from the Nested Pennants die by Spellbinders. Lastly, I added a some Black Burlap string and a sweet little butterfly by Pizzazz Aplenty. It's a pretty simple and straightforward card, but I like the simple elegance of it.

Be sure to check out the WMS sketch challenge, and the two newest Mischief Makers Teresa and Renee!! They're both super talented and super sweet!

post signature

_____________________________________________________

Stamps: Flourishes-Scallops and Dots and Frame It (Waltzingmouse)
Paper: PTI
Ink: Versamark and Onyx Black (Versafine)
Accessories: Nested Pennants die (Spellbinders), Corner Rounder, Rhinestones (I-Rock), Burlap String (May Arts), Butterfly (Pizzazz Aplenty)

Monday, September 12, 2011

One Love, One Lifetime

It's time for another Get Your Diva On challenge over in the Verve forum at Splitcoast Stampers. Would you like to be a guest diva for the next release? All you have to do is make a card following this theme, and link it in the Verve Forum by Sunday the 18th at 9pm mountain. Julee will pick a winner from all the entries.

This month Sankari is challenging us to go monochromatic. I'm not sure if I totally followed that line with the gray added in with the gold/ivory colors. I really tried. Believe me...I so wanted to add some soft blue/green colors (the other side of the dp's I used...:) But I refrained and stuck to these colors. I'm very proud of myself actually...*grin*

I needed an Anniversary card for some dear friends of ours who are celebrating 50 years of marriage. That is so hard to imagine. I haven't even hit the half-way mark yet. I love the set Love Story, so I stamped the "One love, One Lifetime" sentiment, with Onyx Black (Versafine), onto a piece that I first stamped with the lined image from the set Making a Statement. That was stamped with Smokey Gray (Versafine). I then diecut the piece with the Tagged Rectangle die, and added some hearts that I diecut with the Heart die set. I finished it off with some lace, a BoBunny Trinket and some Seam Binding Ribbon.

That about sums up today's card. Be sure to check out the challenge over in the Verve Forum for all the details on how you could be a guest diva!!

Thanks for visiting today.
Have a wonderful week and,
Happy Stamping!!

post signature

___________________________________________________

Stamps: Love Story and Making a Statement (Verve) Paper: Vintage Cream and Smokey Gray (PTI), Sunshine (Lost & Found MME) Ink: Smokey Gray and Onyx Black (Versafine), Black Soot (Ranger Distress) Accessories: Tagged Rectangle and Heart die set (Verve), Border Punches (MS), Lace (Wild Orchid Crafts), Embellishment Trinket (BoBunny), Seam Binding Ribbon (MemrieMare), Natural Burlap String (May Arts), Scor-Buddy, Dimensional Tape (Scotch)

Saturday, September 10, 2011

A Day to Remember!

Hello! Are you glad the weekend's arrived? I hope you're all getting some rest and as well as some creative time.

Today I made a card using this week's VLV sketch designed by the terrifically talented Amy Sheffer!! My daughter is having her first birthday away from home. She's a Freshman in college and is turning 18, so I made a card for her in her style. She loves black, and isn't a huge flower fan. So, I made a Rosette medallion and attached two Tiny Sweet Scallop tags to it. The sentiments are from the Verve sets Sunny Days and Tag Time.

That's it for today. Have a wonderful weekend!!
Happy Stamping!

post signature

____________________________________________________
Supplies
Stamps: Sunny Days and Tag Time
Paper: Rosy Lost & Found (MME), Vintage Cream (PTI)
Ink: Black Onyx (Versafine), Black Soot (Ranger Distress), Colorbox
Accessories: Tiny Sweet Scallop (Verve), Mini Paper Rosette (Sizzix-Tim Holtz), Circle die (Spellbinders), Black Burlap String (May Arts), Button (PTI), Lace (Wild Orchid Crafts), Rhinestones (Kaisercraft and I-Rock),Sewing Machine, Border Punch (MS)

Wednesday, September 7, 2011

Boo!

Wow! I can't believe it's Thursday already. The day almost snuck up on me! Since it is Thursday, I have a CCEE Stampers challenge card to share with you today. Cindy has challenged us to make a circle card, and stitching has to be included. You don't have to tell me twice. :) I love circle cards, and I love sewing on them. So, I used Wednesday's, Splitcoast Stampers sketch 349, as my starting point, along with the cutest "witch" ever from the Waltzingmouse Stamps set Cicely at Halloween. Isn't she adorable? I paper pieced her with some fun Fancy Pants dp called Oct. 31. I love the turquoise with the smokey gray.

I made the spiderweb bg with an Inverted Scallop die by Spellbinders, and a white Souffle pen, and added some Baker's Twinery twine that I got as a Thank you in my Eclectic Paperie order. Thanks Daisy!! :) I also added a sweet little PTI button and some bats that were made with a Martha Stewart corner punch.

That's it...be sure to check out what the other girls have to share today. We'd love to see your circle cards too. Head on over to the CCEE Stampers blog for all the deets.

Thanks for dropping by!
Happy Stamping!

post signature


____________________________________________________

Supplies
Stamps: Cicely at Halloween (Waltzingmouse)
Paper: Smokey Gray (PTI), Oct. 31 (Fancy Pants)
Ink: Onyx Black (Versafine), Black Soot (Ranger Distress)
Accessories: Inverted Scalloped Circle, Standard Scalloped Circle, Standard Circle dies (Spellbinders), White Souffle Pen, Baker's Twine (Twinery), Button (PTI), Bats (MS Punch), Sewing Machine

Tuesday, September 6, 2011

Inspired for Teapot Tuesday


I'm excited to be participating in the Teapot Tuesday Challenges again. I was buys getting my two kids off to college (both over 1000 miles away), so I took a month off from Teapot Tuesday, and the CCEE Challenges. Although I missed both, I was glad to be able to spend time with and help my kids.

So, about this card.

First of all, I used Anya's fabulous WMSC63 sketch as a starting off point.

As for this card's destination, well, it's going to a very special lady, named Eula, who's celebrating her 109th birthday. Yep, you read that right. 109 years living!! Amazing! And to top it off, her birthday is Sept. 14. The same day as my daughter's, who is spending her very first birthday away from home. My little angel is turning 18.

According to Cindy's story about Eula, she attributes "love" to helping her live so long. Cool. For the Teapot Tuesday Challenge, Cindy encouraged us to include things we love in our cards. Well, I love Waltzingmouse Stamps, I love shabby chic, I love My Mind's Eye paper, I love fun embellishments, and like Eula, I love birds. So, that's what you'll find on my card.

Eula mentioned that when she went to get her photo id, the years didn't go all the way back to 1902. They kept questioning her if she was sure that that was when she was born. LOL They finally got it worked out, and all Eula said was "What an adventure". Such a positive outlook. So of course I included dp with the word "adventure" on it from MME's Lost and Found Breeze collection.


The sentiment and frame are from Waltzingmouse Stamps: Blessed by you, and Holiday Label no. 14, and the bird is from Prima.


Isn't this spool top button just super fun? It's from Prima also.


That's it for today's card. I can't wait to get it in the mail and on it's way to Eula. If you'd like to help Eula celebrate 109 years, head on over to the Teapot Tuesday Forum for all the details. Click HERE.

Thanks so much for stopping by. I hope you're having a fabulous week!
Happy Stamping!!

post signature


____________________________________________________

Supplies:
Stamps: Blessed by you, and Holiday Label no. 14 (Waltzingmouse)
Paper: Kraft and Vintage Cream (PTI), Breeze Lost and Found (MME)
Ink: French Roast (a muse), Brushed Corduroy (Ranger Distress), Turquoise Gem (VersaMagic)
Accessories: Labels 14 die (Spellbinders), Spool Button and bird (Prima), Burlap String (May Arts), Lace (MME), Flatback Pearls (Pizzazz Aplenty), Distrezz-it-All (Zutter)

Related Posts Plugin for WordPress, Blogger...
 
Site Design By Designer Blogs